|
The Change export path dialog allows you to specify a new export path rule for the selected already imported documents.
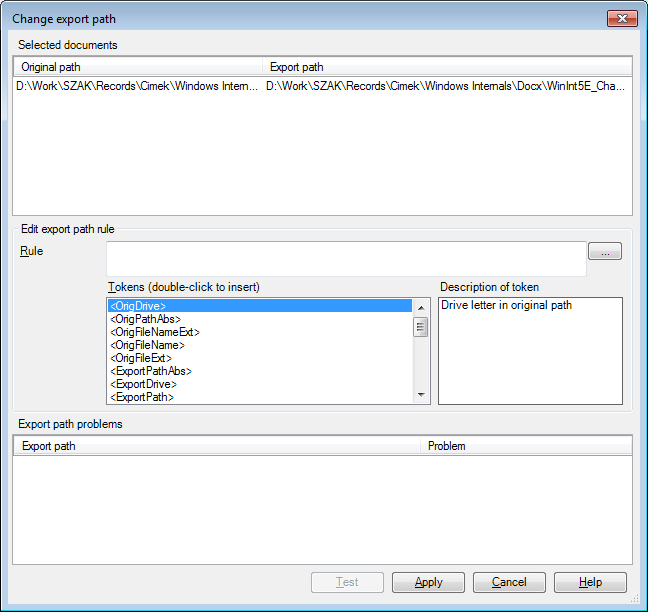
How to beginYou can invoke the Change export path dialog by choosing Export > Change export path on the Documents ribbon tab in Translations pane of Project home. The dialog consists of the following sections: •Selected documents pane: this section indicates the full original path and the export path (if any) of the documents selected in the Translations pane of Project home •Edit export path rule section - this is the place where you can edit and display export path rules. You can write the path using backslashes with fixed strings and/or with tokens. You can also use the ... button to browse for the target folder structure. •Rule: You can write the path using backslashes with fixed strings and/or with tokens. You can also use the ... button to browse for the target folder structure. You have to add also the file names and expressions to the path. The default rule memoQ uses for exporting documents that are imported from a folder and from all its subfolders is the following: <BasePathAbs>_<TrgLangIso3>\<RelativePath>\<OrigFileNameExt> This means that during the export, the documents are saved into the very same folder they came from and with names consisting of the three-letter target language code, the path within the base folder, and the original file name. •Tokens (double-click to insert): Use this pane to insert a token from the list after the current cursor position in the Export path rule field. •Description of token: This field indicates the description of the token selected in the Tokens pane. •Export path problems pane: this section indicates the full original path of the selected documents, and the related test results of the export path entered into the Export path rule field. If the export path rule entered is valid, the Problem column will show OK, otherwise the description of the problem will appear NavigationClick Test to check the export path entered into the Export path rule field for the files indicated in the Selected documents pane. The related test results will appear in the Export path problems pane, while the related export paths will be indicated in the Selected documents pane. Click Apply to save changes while keeping the dialog open, and Cancel to close the dialog without saving changes. Applying a changed export path ruleThe export path rules affect files that were imported after changing the rule. This means that the files need to be re-imported after changing the export path rule, or you need to change the export path in the Translations pane: Select the documents where you want to change the export path and output file name, then click Change export path below the document list. This will change the export path for the files immediately. Note: If you add files to the project, it is always the file rules that are applied. Folder rules come into play only if you use Import > Import folder structure button on the Documents ribbon tab to add documents to your project. If you want to use non-default export path rules for your project, but you do not want to make the new rules the default, do the following: 1. When creating the project, click Finish right after filling in the first wizard page. Do not add documents from the wizard. 2. Change the export path rule in the new (empty) project. Use file rules if you want to add individual files, or folder rules if you want to add entire folders. 3. Add documents to your project. This way, the new rule is applied and the files are exported to the location you specified. |