|
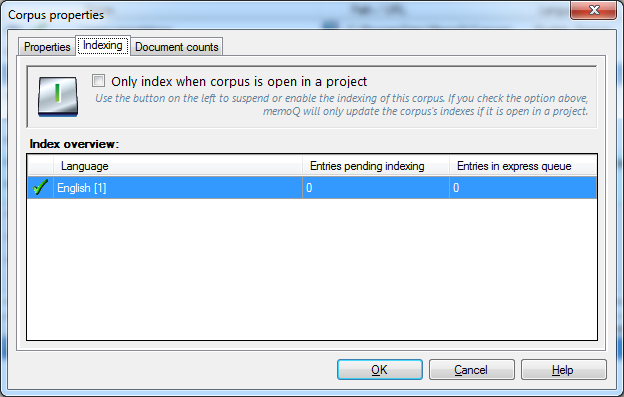
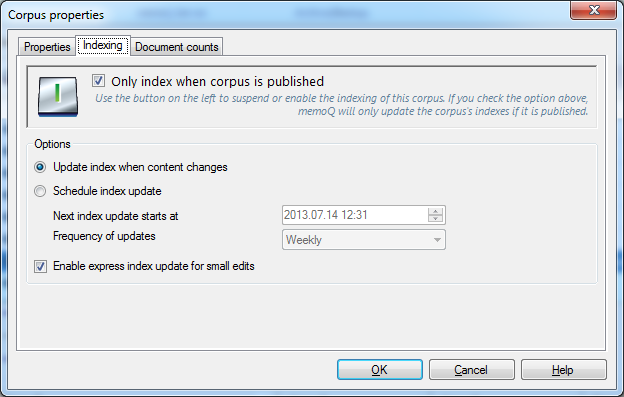
The Corpus properties dialog allows you to change the properties of a LiveDocs corpus. How to beginYou can invoke the Corpus properties dialog from the LiveDocs pane of the Resource console, or from the LiveDocs pane in Project home: right-click the name of a LiveDocs corpus, and, from the popup menu, choose Properties. Alternatively, select a corpus on the list of corpora, and click the Properties button on the LiveDocs ribbon tab. UseThis dialog has two tabs: Properties and Indexing. The Properties tab has three sections: Location, Corpus properties, and Meta-information. You cannot change the location, the name or the path. This section allows you to specify where memoQ should store the newly created LiveDocs corpus. •My computer: Select this radio button if you want to store the new LiveDocs corpus on your own computer. •Remote: Select this radio button if you want to store the new LiveDocs corpus on a remote server. The name or IP address of current server is also displayed in this section. This is the default setting for Location. Corpus properties section: This section allows you to specify the properties of a new LiveDocs corpus, or to view the name and the location of an existing LiveDocs corpus. •Name: Use this field to enter the name of the LiveDocs corpus (required). LiveDocs corpora must have unique names. It is not possible to change the name after you create the corpus. •Path: This field indicates the full name of the folder where the LiveDocs corpus will be stored. It is pre-set according to the path specified in the Locations pane of the Options dialog. When you create the corpus, you can change the default path for the corpus you are creating. You cannot change the path after the corpus was created. Meta-information section: This section allows you to specify the meta-information for the new translation memory. •Project: Enter the project identifier. •Domain: Enter the domain of the corpus. •Client: Enter the client identifier. •Subject: Enter the subject of the corpus. •Description: Enter a description of the corpus. The Indexing tab allows you to see the status of the indices, start and stop indexing, or set up whether LiveDocs corpus indexing should happen all the time or only if the corpus is used in a project. If you are not getting results from a LiveDocs corpus, make sure that you have the "Play" icon enabled here.
For local projects
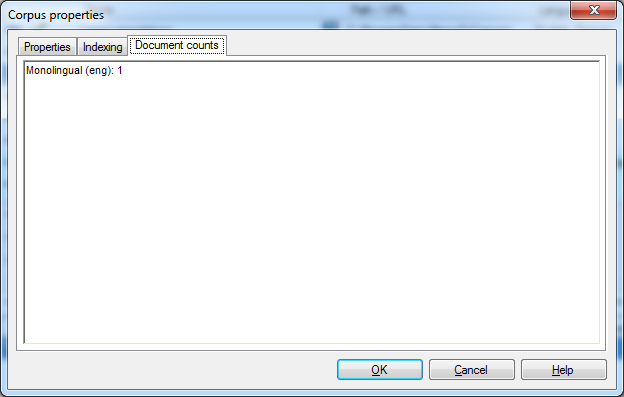
For online projects Next to the Indexing tab, you see the number of corpus documents in the corpus's properties window. The counts per document type and per language/language pair, as applicable: Bilingual, Alignment, Monolingual, Binary are listed, for example: Bilingual (eng - ger) 34 Bilingual (ger - eng) 54 Bilingual (hun - ita) 2 Monolingual (eng) 1 Binary 1
The information is displayed for local and online corpora, and it reflects up-to-date values when checking an online corpus. NavigationAfter making changes to the fields, click OK to modify the LiveDocs corpus. Click Cancel to close the dialog without committing changes. |