|
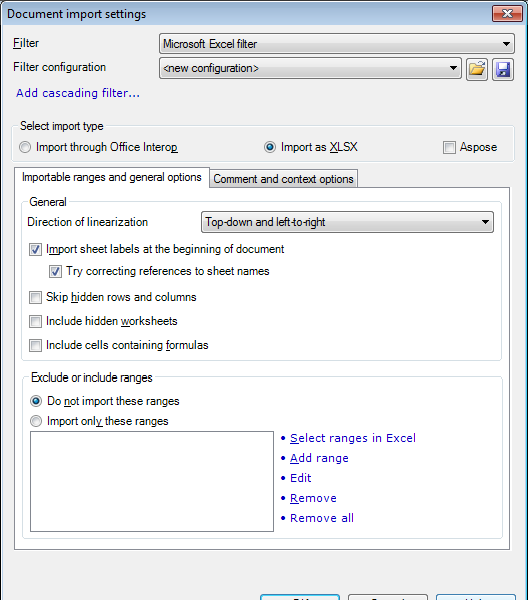
Use this dialog to control how Microsoft Excel workbooks (.xls and .xlt files) are imported into memoQ. How to beginIn the Translations pane of Project home, choose Import > Import with options button on the Documents ribbon tab, and in the Open dialog, locate and select a XLS or XLT file (with the .xls or .xlt extension). OptionsmemoQ has two Microsoft Excel filters: the Excel 2007/2010 filter, and the traditional Excel filter that works by loading the workbook in Excel, and gets the content by calling on the other application. This dialog appears if you are importing a legacy Excel workbook with the *.xls extension. In the Select import type section, you can choose how you want to import the workbook: •Import through Office interop: Choose this radio button if you want to import the workbook the traditional way. In this case, you will get the text with uninterpreted formatting tags. •Import as XLSX: If you choose this radio button, memoQ will call on Excel to save the workbook in the XLSX format, and then import the saved XLSX file directly. If you choose this, the options in this dialog become the same as in the Microsoft Office Excel 2007/2010/2013 import settings dialog. This radio button is enabled by default. •Aspose: Use this option to convert a XLS file to XLSX and to import with the XSLX filter (see Aspose). Important: This is the default setting if you have Office 2007 or higher installed. However, Office 2007, Office 2010, Office 2013 or the Compatibility Pack (for earlier Office versions) must be installed in order to use this setting. The following options are available only if you import the workbook through Office interop. If you choose to import the workbook as XLSX, see the Microsoft Office Excel 2007/2010/2013 import settings dialog. Direction of linearization section: This section enables you to choose the direction of import – you can decide if you want to translate the Microsoft® Excel® document by rows or columns and from first to last or vice versa. The four tables below illustrate these four options.
Non-translatable data ranges section: This section enables you select any number of cells, rows or columns in Microsoft® Excel®, which will not be imported. Use this tool to mark all cells, rows or columns that do not need to be translated. The idea behind excluding data ranges instead of specifying what data ranges to translate is that you never forget about translating anything. •Select ranges: Click this button to start Microsoft® Excel® and to open the Mark selected ranges dialog to mark non-translatable cells, rows or columns in Microsoft® Excel® directly. Any ranges you select using the Mark selected ranges dialog will be recorded as Microsoft® Excel® codes in the Non-translatable data ranges pane. These codes have the following structure: •Remove selected: Click this button to remove a selected range from the Non-translatable data ranges pane. •Remove all: Click this button to remove all ranges from the Non-translatable data ranges pane. Comment options section: This section enables you decide if you want to import certain parts of the Microsoft® Excel® file as comments into memoQ: •Do not use commenting: Select this radio button to skip importing comments. This is the default setting. •Use a general comment rule, comment for cell A1 should be: Select this radio button to define a simple rule to be applied to all cells in the document. Customize the code in the input field on the right to specify the required general comment rule relative to cell A1. The input field is shaded in red if the code you enter is not valid. •Use advanced commenting: Select this radio button, and click the button labeled Comment options to invoke the Advanced comment options dialog where you can specify comprehensive requirements for the import of comments. If a certain range of your Microsoft® Excel® file (a column, for example) is imported as comments and you do not want to have the range imported for translation, which is often the case, mark this section as non-translatable (see above). Additional options section: •Insert sheet labels at the beginning of the document: Check this check box to import the names of the different worksheets of the translation document as the first segments. •Include cells containing formulas: Check this check box to import formulas for translation. This is useful if you need to localize formulas in Microsoft® Excel® files. •Import context IDs: Select this radio button, and click the button labeled Context options to invoke the Advanced context options dialog where you can specify comprehensive requirements for the import of context IDs. | ||||||||||||||||||||||||||||||||||||||||||||