|
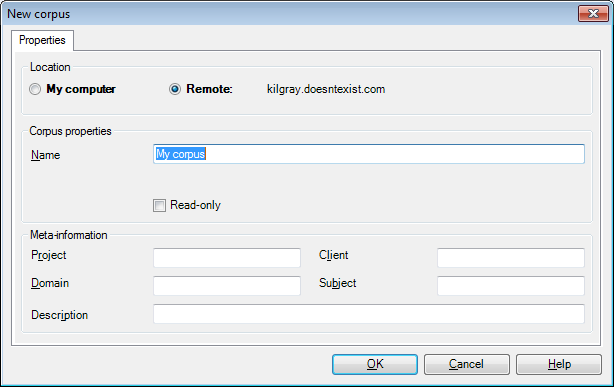
The New corpus dialog allows you to specify the properties of a new LiveDocs corpus. When you finish editing information in this dialog and click OK, the new LiveDocs corpus is physically created on your hard drive and registered within your installation of memoQ. How to beginIn the LiveDocs pane of the Resource console, click Create new below the upper list (the list of corpora). Alternatively, in the LiveDocs pane of Project home, click the Create/Use New button on the LiveDocs ribbon tab. UseThis dialog has three sections: Location, LiveDocs corpus properties, and Meta-information. Filling in the location and properties sections is required; the settings in Meta-information may be either left empty or with default values, or customized. If you start this dialog with a project open in memoQ, some of the fields are pre-filled with the project default values (entered in the Project information dialog of the New memoQ project wizard or the Settings pane of Project home). This section allows you to specify where memoQ should store the newly created LiveDocs corpus. •My computer: Select this radio button if you want to store the new LiveDocs corpus on your own computer. •Remote: Select this radio button if you want to store the new LiveDocs corpus on a remote server. The name or IP address of current server is also displayed in this section. This is the default setting for Location. Note: The Location section is not active if My computer is selected as the active server. In this case, only a local corpus can be created. Corpus properties section: This section allows you to specify the properties of the new LiveDocs corpus. •Name: Use this field to enter the name of the LiveDocs corpus (required). LiveDocs corpora must have unique names. It is not possible to change the name after you create the corpus. •Path: This field indicates the full name of the folder where the LiveDocs corpus will be stored. It is pre-set according to the path specified in the Locations pane of the Options dialog. On the other hand, you can change the path for the particular corpus by clicking the Meta-information section: This section allows you to specify the meta-information for the new corpus. •Project: Enter the project identifier. •Domain: Enter the domain of the corpus. •Client: Enter the client identifier. •Subject: Enter the subject of the corpus. •Description: Enter a description of the corpus. NavigationAfter filling in all compulsory information, click OK to create the LiveDocs corpus. Click Cancel to close the dialog without creating a LiveDocs corpus. When you add the corpus to your project, you will get matches for pre-translation and matches in the translation results pane. Corpus matches are also included in Statistics. Important: If the document's target language is "specific" (includes a sublanguage designation), then memoQ only keeps matches from corpus documents whose target language is either not-specific (main language, no sublanguage), or has the same sublanguage. This yields fewer matches. If the document's target language is not specific, then you get more matches. |