|
Using the Query TM Repository wizard, you can create a new translation memory on a memoQ server by querying a TM Repository store. The Query TM Repository wizard will use the meta-information of your project – and the descriptive fields you specify – to retrieve specific translation units from the TM Repository store, and create the new translation memory from them.
Before you can use the Query TM Repository wizard, you need to select a memoQ server in the Server URL box in the Resource console that is connected to a TM Repository server. To connect your memoQ server to a TM Repository server, use the TM Repository category of the Server Administrator.
How to begin
Start querying the TM Repository from the Translation memories pane of the memoQ online project dialog and from the Resource console as well. If you are using the memoQ online project dialog, the online project must be stored on a server that is connected to a TM Repository server. In the Resource console, you need to choose a suitable memoQ server in the Server URL box. Under the list of translation memories, click Query Repository. Alternatively, you can right-click the list of translation memories, and choose Query Repository from the popup menu.
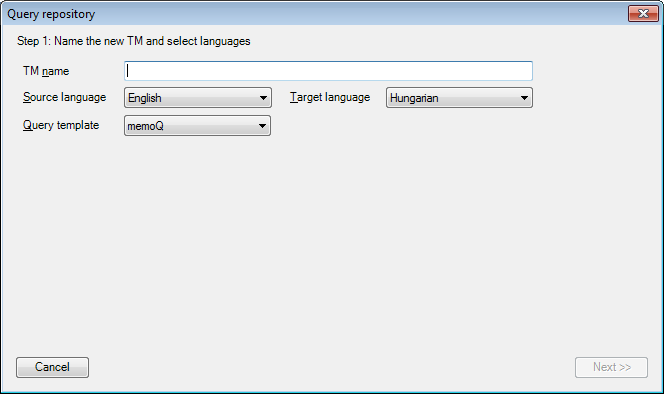
Step 1: Name the new TM and select languages
In the first wizard page, you need to type a name for the new translation memory. This name will appear in memoQ, but it will also be the name of the query in TM Repository.
You also need to select a source language and the target language for the query. However, if you started the query from a project (from Project home or the memoQ online project window), the project languages are already selected. If the project has multiple target languages, the current target language is chosen in the Target language drop-down box.
In the Query template drop-down box, you can choose from the query templates that exist on the TM Repository server. The query template specifies what descriptive information you can use when querying the TM Repository database from memoQ. Intially, there is only one query template, and it is not recommended to change the setting in the Query repository wizard.
Note: You can create new query templates in TM Repository. It makes sense if you have changed the descriptive fields you use in the TM Repository store.
Normally, if you are starting off from a local or an online project, you need to type a name only.
After you specify all necessary information, click Next.
|
Step 2: Fill in query properties
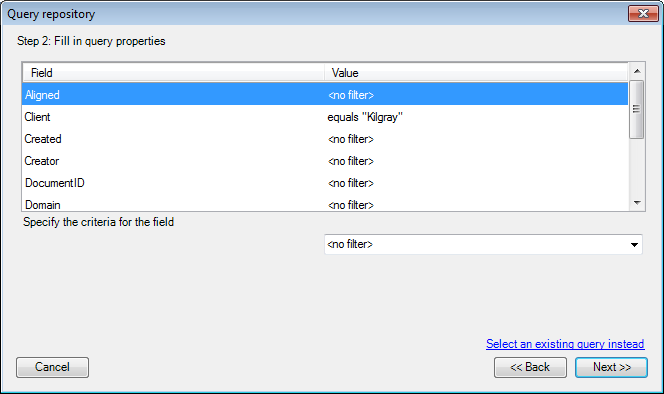
In the second wizard page, you can specify the descriptive fields for the database query. TM Repository will return translation units that match the query values you choose.
For each field in the query template, you can specify one value, and TM Repository will look for an exact match. If you need to use a more detailed or more flexible query, you can use the TM Repository web pages to create one. If you want to use an existing query from the TM Repository, or you want to create a new query using the TM Repository web pages, click the Select an existing query instead link. The wizard page will change into an alternate Step 2 where you can choose from queries that exist in the TM Repository. (See the Alternate Step 2 section in this topic for more information.)
To specify a value for a descriptive field, click the corresponding row in the list. If the descriptive field takes its values from a picklist, or it is a free-text field, a drop-down box appears below the list. If the descriptive field is a date, two date selectors appear, so that you can select a date interval.
To save your selection to the list, click another row. Your selection will appear in the Value column.
Note: If you started your query from a project (from the memoQ online project window or from Project home), memoQ automatically fills in descriptive fields that are already filled in for the project. In the example, the Client field in the project is Kilgray, and memoQ is automatically using this value in the query.
After you specify all necessary query values, click Next. To change the name or the language pair of the new translation memory, click Back.
|
Alternate Step 2: Fill in query properties by selecting or creating a custom query in TM Repository
This wizard page appears if you click the Select an existing query instead link in the second page of the Query repository wizard.
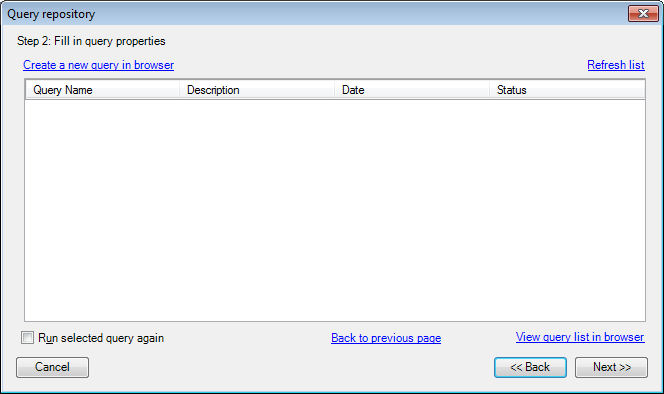
In this wizard page, memoQ lists those TM Repository queries that are in the Mapped or the Ready state.
•To use the existing result set of an existing query, select its name in the list, and click Next. •To use an existing query from the TM Repository, but you want to include new items since the query was created, select the query, check the Run selected query again check box, and then click Next. •To create a new custom query in TM Repository itself, click the Create a new query in browser link. memoQ opens the Query wizard of TM Repository in the default browser. For more information on TM Repository's Query wizard, see the TM Repository help pages on the Kilgray website. Note: This navigates you away from memoQ. It is recommended that you leave memoQ and the Query repository wizard open as it is. After you create the new query in TM Repository, and it was run, you can return to this wizard page, and click the Refresh list link. This displays the new query in the list: you can select it and click Next to create a memoQ server TM from the results.
•If you do not see a specific query in the list, but you know it exists, click the View query list in browser link. This opens the default browser, and displays the Queries page of TM Repository. You can review, re-create or re-run queries there. For more information on TM Repository's Queries page, see the TM Repository help pages on the Kilgray website. •To use the 'simple' method to query the database, and specify values for descriptive fields in the default query template, you can return to the original wizard page: click the Return to list of fields link. |
Step 3: Set TM properties
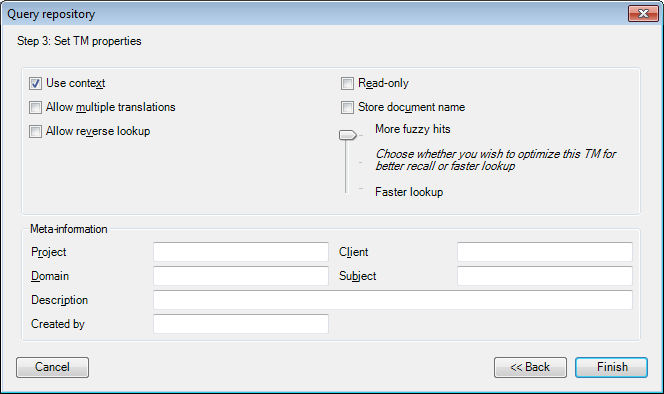
In this wizard page, you can set the memoQ-specific properties of the new translation memory. For more information on these details, see the Help topic for the Translation memory properties dialog.
Note: If you choose to use context or store document names in the translation memory, those details will be saved in the TM Repository too, when the translation memory is used to update the TM Repository database.
After you specify translation memory properties, click Finish.
|
Starting to use the new translation memory
After you click Finish, an empty progress window opens:
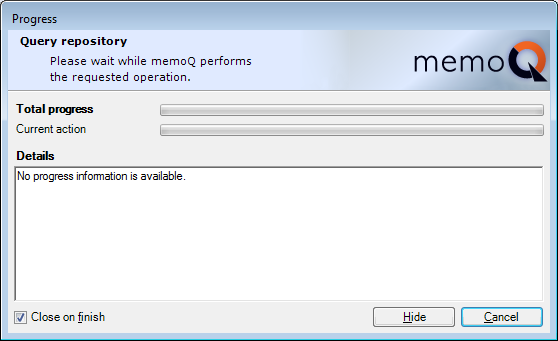
Although you can keep this window open and wait until the query finishes, you can also click Hide to continue the query in the background, and perform other work in memoQ.
Note: Do not click Cancel in this dialog: it will abort the query. Click Hide instead to continue querying the TM Repository in the background.
If the query runs in the background, here is how you can check on the new translation memory:
1.Select the memoQ server in the Server URL box, and click Select. The new translation memory appears in the list. 2.Right-click the name of the new translation memory, and choose Properties. Look at the Description box in the Translation memory properties dialog: 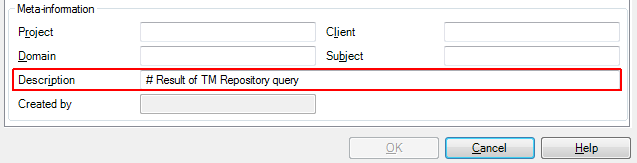
If the Description box shows # Result of TM Repository query, the query was successful, and the new translation memory is ready to use.
3.To include the new translation memory in your project, check the check box at its name. From this point on, you can use the new translation memory as any other. However, you can also use it to update the TM Repository: set it as a primary TM in your project, perform a translation task, and use the Update Query command in Project home or the memoQ online project dialog to update the TM Repository store.
|
Navigation
You can always cancel the query by clicking Cancel in any wizard page.
Click Back to return to the previous wizard page and change settings.
Click Next to proceed to the next wizard page after you fill in all necessary settings.
In the last wizard page, click Finish to start the query.
|