|
Use this dialog to control how memoQ imports TMX files. TMX files are translation memory exchange files. In most cases, these files are bilingual. In rare cases, they can be multilingual. If that is the case, splitting and joining of segments is not possible.
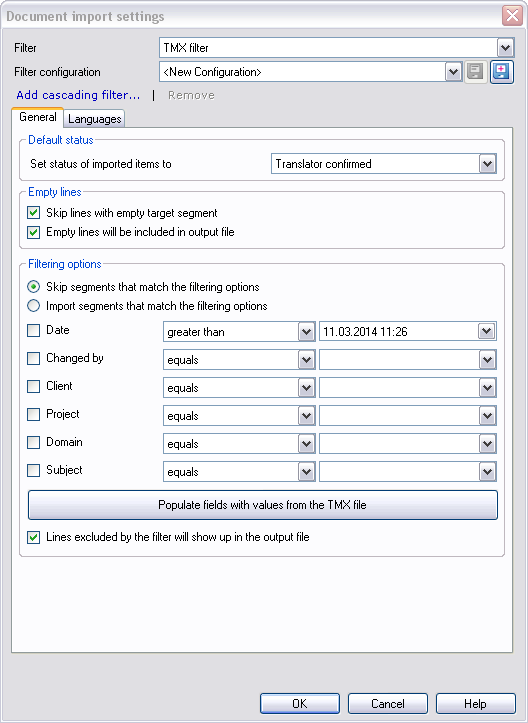
How to beginIn the Translations pane of Project home, choose Import > Import with options button on the Documents ribbon tab, and in the Open dialog, locate and select a TMX file (with the *.tmx extension). OptionsThe languages are matched with the main language, for example you have a project with English-US and your TMX file contains English-UK, the translation units will still be imported. Note: If the target language segment is missing, this row is skipped on import, but it will be exported back, when you export the TMX. Note: The NOTE elements are imported as comments. General options tab: •Default status section: From the Set status of imported items to drop-down list, choose a status to which the segment status should be set. By default, it is set to Translator confirmed. You can also set it to: Assembled from fragments, Not started, Partially edited, Pre-translated, Reviewer 1 confirmed, Reviewer 2 confirmed, Rejected, Translated by machine. •Empty lines section: oSkip lines with empty target segment check box: Check this check box to not import the segments with empty targets to the project. The check box is enabled by default. oEmpty lines will be included in output file check box: This check box is checked by default. It includes the empty lines in the output file. When you disable the Skip lines with empty target segment check box, this option is not available. •Filtering options section: oSkip segments that match the filtering options: Click this option to skip segments that match filtering options. This option is enabled by default. oImport segments that match the filtering options: Click this option to import segments with filtering options. You can filter for: ▪Date: Choose greater than or less than from the drop-down list, then choose a date from the drop-down list next to it. ▪Changed by: Choose equals or not equals from the drop-down list, then choose a name from the drop-down list next to it. ▪Client: Choose equals or not equals from the drop-down list, then choose a name from the drop-down list next to it. ▪Project: Choose equals or not equals from the drop-down list, then choose a name from the drop-down list next to it. ▪Domain: Choose equals or not equals from the drop-down list, then choose a name from the drop-down list next to it. ▪Subject: Choose equals or not equals from the drop-down list, then choose a name from the drop-down list next to it. Note: Each check box, when checked, adds a new condition to the filter. You need to click the Populate fields with values from the TMX file button to populate the values. oLines excluded by the filter will show up in the output file check box: This check box is checked by default. It will show the excluded lines in the output file.
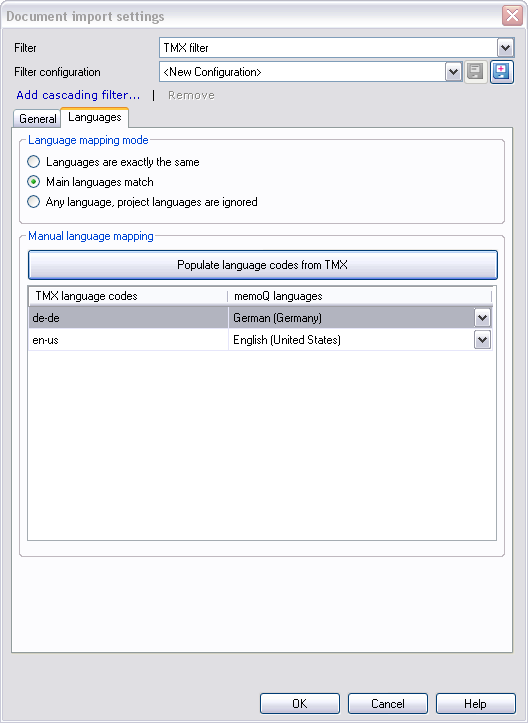
Languages tab:
•Language mapping mode section: oLanguages are exactly the same option: Choose this option when the languages should exactly be the same - main and sublanguages (e.g. your project has EN-US, the TMX must contain EN-US as well). oMain languages match option: Choose this option when the main language of the project should be matched - main language and sublanguage can differ (e.g. your project has EN, the TMX contains EN-US). oAny language, project languages are ignored option: This option allows the import of anything (e.g. a project with EN-US as source language and GER-DE will import a TMX with different source and target languages like Russian and French). •Manual language mapping section: oClick the Populate language codes from TMX button to populate the languages from the TMX file. The languages are then listed in the TMX languages box. After you populated the TMX file, choose languages to map them with. Choose from the TMX language codes and the memoQ languages drop-down list to map the language codes. Note: When you export the TMX file again, the import process is reverted. If you have not changed a segment, it keeps its last changed ID and last changed date. If the segment was edited, the last changed ID and date are copied over from memoQ into the TMX file. Note: If you have joined and split segments, then these segments will get a new creation date and creation ID. The original segments will not be copied back to the export file.
|