To do this, click the Translation grid tab.
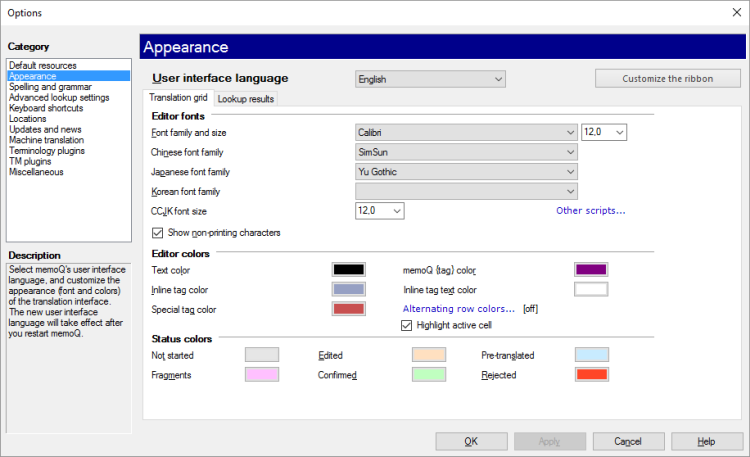
To change the font faces and sizes, use the settings under Editor fonts:
▪Font family and size: Choose the font family and the font size to display text in the translation editor, in the alignment editor, and in the LiveDocs editor tabs. This applies to alphabetic languages. ▪Chinese font family: Choose the font family to display Chinese text in the translation editor, in the alignment editor, and in the LiveDocs editor tabs. ▪Japanese font family: Choose the font family to display Japanese text in the translation editor, in the alignment editor, and in the LiveDocs editor tabs. ▪Korean font family: Choose the font family to display Korean text in the translation editor, in the alignment editor, and in the LiveDocs editor tabs. ▪CCJK font size: Choose the font size to display text in Chinese (traditional), Chinese (simplified), Japanese, or Korean. ▪Show non-printing characters check box: Normally, memoQ does not show characters for spaces, tabs, or newlines. To display these characters, check this check box. Are some of the boxes empty? Maybe your computer is missing a font for that language. And when that happens, you cannot open documents where this language is the source or the target language. To solve this, install the language pack in Windows for both your source language and your target language. To do this, open Control Panel in Windows. Choose Language, click Add language, then choose the language you need, and - at the bottom - click Add. Then, next to the language, click Options, and then click Download and install language pack. (This is what you do in Windows 10; to our knowledge, the error occurs most often in Windows 10 and with the Korean language.)
To change the colors of the text in the translation editor:
▪Text color: Click this to choose the color of normal text in the translation editor, in the alignment editor, and in the LiveDocs editor tabs. ▪memoQ {tag} color: Click this to choose the color of legacy memoQ formatting {tags} in the translation editor, in the alignment editor, and in the LiveDocs editor tabs. ▪Inline tag color: Click this to choose the background color for the inline tags in the translation editor, in the alignment editor, and in the LiveDocs editor tabs. ▪Inline tag text color: Click this to choose the color to display text in inline tags in the translation editor, in the alignment editor, and in the LiveDocs editor tabs. ▪Special tag color: Click this to choose the color of special tags in the translation editor, in the alignment editor, and in the LiveDocs editor tabs. To change the colors that indicate the status of each segment:
▪Not started: Click this to choose the color to indicate segments that have not been touched yet. ▪Edited: Click this to choose the color to indicate segments that have been edited but not confirmed yet. ▪Pre-translated: Click this to choose the color to indicate segments that have been pre-translated but not edited since. ▪Fragments: Click this to choose the color to indicate segments that contain a fragment-assembled or machine-translated match. ▪Confirmed: Click this to choose the color to indicate segments that have been confirmed. ▪Rejected: Click this to choose the color to indicate segments where the translation has been rejected by a reviewer. |