|
Some documents and reports can be exported automatically without setting specific options. All you need to set is the path and the name of the documents. Then, in a project created from a project template, memoQ server can export the documents and reports automatically. This works for the following: ▪Exporting original source documents on the server ▪Exporting target (translated) documents on the server ▪Exporting LiveDocs corpora in XLIFF files on the server (available after project wrap-up only) ▪Exporting quality assurance (QA) reports on the server. A QA report has the statistics of automated warnings about the translation. How to get here1.Open Resource console. Choose Project templates. Online projects only: Use an online template for this. Choose your memoQ server at the top of Resource console. Click Select. 2.Select the project template where you want to change the workflow status of documents when necessary. Right-click the selection, and click Edit. Online projects only: This action isn't available in local projects. If the eye is closed in the top right corner of the Edit project template window, click it. 3.In the Edit project template window, choose Automated actions. Click the Project automation tab if you don't see it at first. 4.Under Available triggers, click an event when you want memoQ to export the content. 5.Next to Actions added to the selected trigger, click the + sign. The Select actions you want to add to the trigger window appears. 6.Choose one of the following: ▪Export source documents on server ▪Export target documents on server ▪Export QA report on server ▪Export LiveDocs corpora on server (available after project wrap-up only) The corresponding settings window appears. If you can't add this action because it's already there: Under Actions added to the selected trigger, click the same action. Next to the list, click the Settings
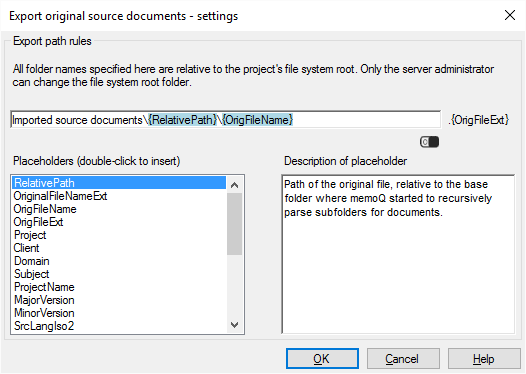
Export source documents on server
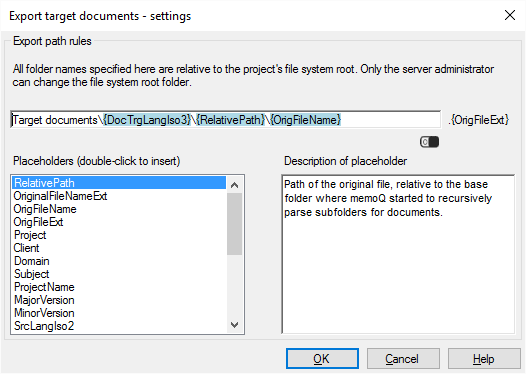
Export target documents on server
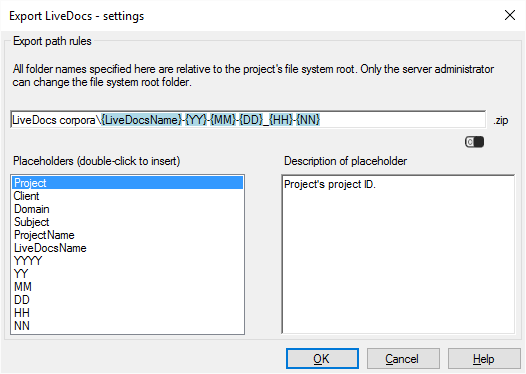
Export LiveDocs corpora on server
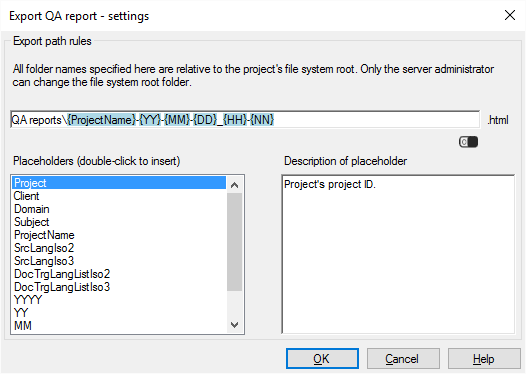
Export QA report on server What can you do?Under Export path rules, set up the folder and name of the exported files. You can use placeholders, so that memoQ server takes the name from the name of the project, the date or time when the file was created, the project languages, and so on. memoQ fills in the placeholders with actual details in ongoing projects that are created from this project template. There is a fixed main folder: memoQ server exports the document to the project's file store. This is a folder on the server. Only a system administrator can change the location of that folder. Normally, memoQ server saves the exported files in one of the following folders, depending on the content type: ▪Source documents: Imported source documents, and the inside folder - if a folder structure was imported originally ▪Target documents: Target documents, and then a folder for the target language, then the inside folder (if a folder structure was imported) ▪LiveDocs: LiveDocs corpora ▪QA report: QA reports The default names are the following for each file type: ▪Source documents: The original file name ▪Target documents: The original file name (because the document is already exported in a subfolder for the target language) ▪LiveDocs: Name of the corpus, then the date and time when the corpus is exported ▪QA report: Name of the project, then the date and time when the report is exported You can change this: You can add folders to the path, or you can use different placeholders in the name. You can also use these placeholders in the names of the folders. Don't change the main folder. Click to expand the list of placeholders you can use
When you finishTo add the action to the project template: Click OK. Nothing is exported when you click OK: To export the files automatically in an ongoing project: Create a project from this project template, and start working on it. Check the output folders. To return to the Edit project template window, and not add an action to the project template: Click Cancel. |