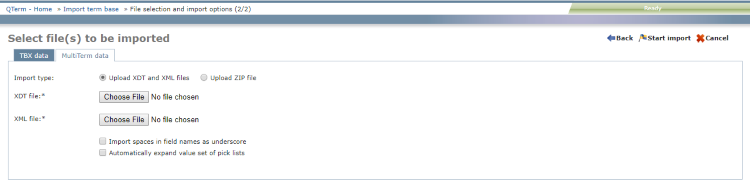
Page 1 - Select file(s) to be imported

Click Choose file and browse to the file to upload. You can choose an XLS, XLSX, CSV, or TXT file, zipped or unzipped.
•To go to Page 2: In the upper right corner, click Next. •To close the wizard and return to the Home screen without importing into the term base: In the upper right corner, click Cancel. Page 2 - File properties

1.Choose a Layout. To learn about the options, click their help  icons. icons. 2.The Preview section appears: 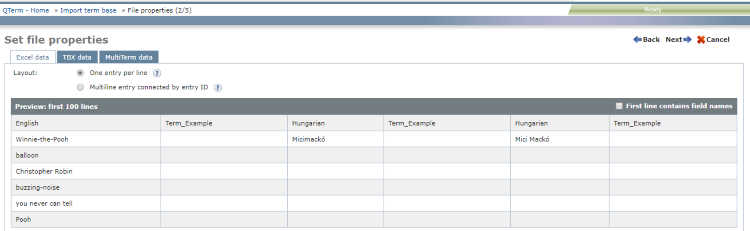
3.If the imported file has column headers in the first row, check the First line contains field names check box. •To return to Page 1: In the upper right corner, click Back. •To go to Page 2: In the upper right corner, click Next. •To close the wizard and return to the Home screen without importing into the term base: In the upper right corner, click Cancel. Page 3 - Define mappings between file columns and term base metadata
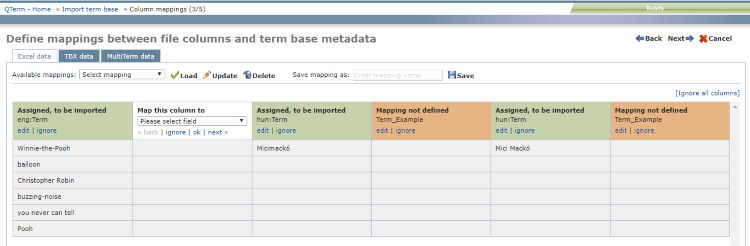
The column headers are color-coded:
•Green means QTerm could automatically map this column to a term base field. If it is correct, you do not need to touch it. oIf the automatic mapping is incorrect: Click edit. The column header becomes white (see below). oTo leave the field out of the import: Click ignore. The column header becomes gray. •Orange means QTerm could not automatically map this column to a term base field. You need tell QTerm how to map it. oTo specify mapping: Click edit. The column header becomes white (see below). oTo leave the field out of the import: Click ignore. The column header becomes gray. •White means you are telling QTerm how to map this column. oIf the automatic mapping is incorrect: Under Please select field, choose a field, then click ok. oTo leave the field out of the import: Click ignore. The column header becomes gray. oTo jump to the previous unmapped (orange) field: click back. oTo jump to the next unmapped (orange) field: click next. •Gray means you told QTerm to ignore this column. It will not be imported into the term base. Select a mapping from the Available mappings dropdown and click Load, or go through the columns and make sure each is either green or gray.
To change the mapping you selected: Click Update.
To delete the mapping you selected: Click Delete.
To save the current mapping: Enter a name in the Save mapping as field, and click Save.
•To return to Page 2: In the upper right corner, click Back. •To go to Page 4: In the upper right corner, click Next. •To close the wizard and return to the Home screen without importing into the term base: In the upper right corner, click Cancel. Page 4 - Import options

By default, term base entries are added as new entries to the term base. To update your term base entries instead, check the Update based on entry ID check box.
To set default values for optional metadata which have no default values in the term base definition and in the imported file, check the Set default value for missing optional fields check box. The optional fields are listed in three sections: Entry, Language and Term.
•To return to Page 3: In the upper right corner, click Back. •To go to Page 5: In the upper right corner, click Next. •To close the wizard and return to the Home screen without importing into the term base: In the upper right corner, click Cancel. Page 5 - Import summary
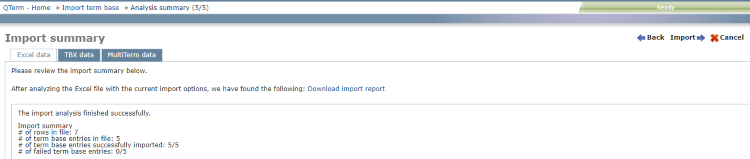
This page shows the result of the import analysis.
•To return to Page 1: In the upper right corner, click Back. •To close the wizard and return to the Home screen without importing into the term base: In the upper right corner, click Cancel. •To import the term base data: In the upper right corner, click Start import. |