Custom field properties
You can add custom descriptive fields to a translation memory. These descriptive fields help memoQ rank matches that you receive from different translation memories.
To use the descriptive fields: you need to set up filters in the TM settings profile that you use in your project.
How to get here
- Start creating a translation memory.
- In the New translation memory window, click the Custom fields tab.
- Below the list of custom fields, click Add.
To edit an existing custom field: Click the name of the field. Below the list, click Edit.
Or:
- Open a project. In Project home, choose Translation memories.
Or: Open the Resource console. Choose Translation memories.
Or: Open an online project for management. In the memoQ online project window, choose Translation memories.
- Right-click the name of the translation memory you want to modify. Choose Properties.
- The Translation memory properties window appears. Click the Custom fields tab.
- Below the list of custom fields, click Add.
To edit an existing custom field: Click the name of the field. Below the list, click Edit.
- In the top left corner of the memoQ window, in the Quick access toolbar, click Options.
- In the Options window, choose Miscellaneous.
- Click the Default TM scheme tab.
- Below the list of custom fields, click Add.
To edit an existing custom field: Click the name of the field. Below the list, click Edit.


What can you do?
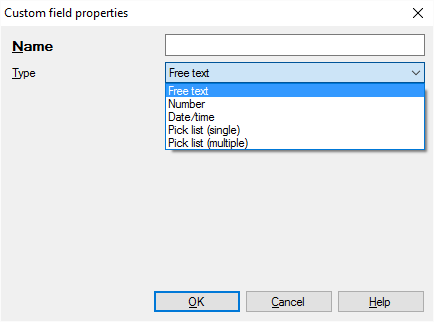
Give the field a name: Type a name in the Name text box.
You can't change the name of an existing field: If you're editing an existing field, the Name box is grayed out.
In the Type drop-down list, choose a type for the custom field. Choose one of the following:
- Free text: The field will contain free text
- Number: The field will contain a whole number from -2 billion to 2 billion
- Date/time: The field will contain a date/time value. This is also called a timestamp
You can set up a field where the user has a choice of values. You need to list the values here.
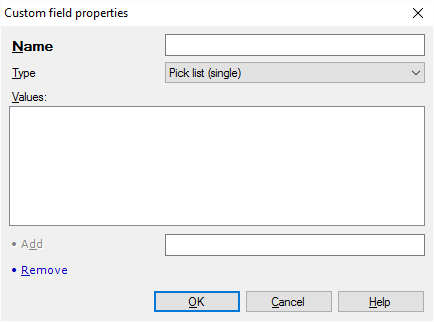
- In the Type drop-down list, choose Picklist (single) or Picklist (multiple). The difference between the two is that a single picklist field can be added only once to the translation memory. A multiple picklist field can be added several times, with different values.
- To set up the list: Type a value in the text box at the bottom of the Custom field properties window. Click Add. Repeat this until all the values are on the list.
To remove a value: Select it in the list. Click Remove. To change a value, remove it first. Then add it again in a modified form.
When you finish
To create or change the custom field, and return to the previous window: Click OK.
To return to the previous window, and not create the custom field: Click Cancel.
Possible next step: Set up the TM settings profile for your projects. Edit it, and add filters for the custom fields you just created.