Options
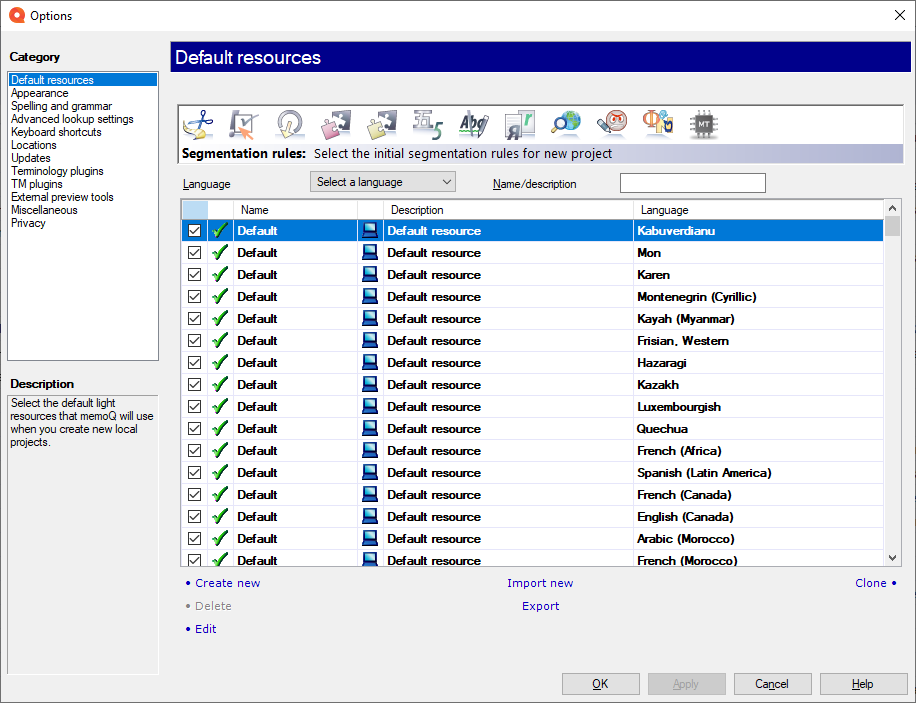
In the Options window, you can control the overall behavior of memoQ. You can also choose some default resources for new projects.
Options apply to your own copy of memoQ: In the Options window, you control your own copy of memoQ - the one that is installed on your computer. The changes you make here do not affect any other copies of memoQ, and neither do they change anything on memoQ servers.
Options apply to your copy of memoQ, and not to a project: If you change a setting, that will change the behavior of your copy of memoQ - in all projects that you work on. If you open the same project in another copy of memoQ - that has different settings -, it will behave differently.
How to get here
At the very top of the memoQ window - in the Quick Access toolbar  -, click the Options (cogwheels)
  icon. The Options window opens.
Or:
- In the ribbon, click the memoQ tab.
- In the menu, click Options. The Options pane appears.
- Under memoQ options, click Options. The Options window opens.
Opens in new window: You do not have to close Options to return to the memoQ main window. You can switch to it by pressing Alt+Tab, or by clicking the memoQ icon on the Windows taskbar.

What can you do?
On the left, choose the category you need. There is Help for each category. Click the name of the category to get there:
- Default resources: Choose default resources (segmentation rules, QA settings, ignore lists etc.) for new projects. Do not mix these with resources in project templates. If you create a project from a template, memoQ will use the settings from the template, and not from these options.
- Appearance: Font and color settings for the translation editor and the Translation results pane. Use this to make the translation editor more readable.
- Spelling and grammar: Open this to set up the spell checker. Choose to use Word or Hunspell. If you choose Hunspell, you can download and install new dictionaries. Set up the spell checker for every target language you work with.
- Advanced lookup settings: Choose how memoQ should offer automatic concordance results, and how it should put together suggestions from fragments (shorter translation memory units and terms). Do not change the defaults unless you are entirely certain that you will get better suggestions as a result. If you just tamper with these settings, you may lose productivity. To learn more about these types of suggestions, see Help about the Translation results pane.
- Keyboard shortcuts: Choose or edit keyboard shortcuts for frequent commands in memoQ. Do not change these before you learn to use memoQ thoroughly. After you change keyboard shortcuts, the Help pages may not help you find them.
- Locations: Check or change the locations of memoQ folders. These are the folders memoQ places local projects and checkouts, translation memories, term bases, and others. You may need to change these if you are running low on disk space on your default drive. Do not change them unless it is absolutely necessary. Do not place them on network drives. If you place these folders in synchronized locations (local copies of Dropbox, Onedrive etc.), memoQ may become slower.
- Updates: Choose how memoQ should check for updates.
- Terminology plugins: Set up external terminology resources. memoQ can connect to various external terminology providers.
- TM plugins: Set up access to external translation memory services.
- External preview tools: Manage preview tools that are not built into memoQ, but installed separately.
- Miscellaneous: Configure various settings that control how memoQ's editing interface works.
- Privacy: Learn about memoQ's privacy policy, and enable or disable anonymous usage data sharing with memoQ's designers and developers.
When you finish
To save the settings and return to memoQ: Click OK.
To save the settings and remain in the Options window: Click Apply.
You can keep the Options window open: After you click Apply, you can switch to the memoQ main window by pressing Alt+Tab or by clicking the memoQ icon on the Windows taskbar.
To return to memoQ without making changes: Click Cancel.