Administration > Users > Edit user
You can edit a user account from the memoQ server here.
Navigation
- Melden Sie sich bei memoQWebNext als Administrator an.
- Klicken Sie in der linken Seitenleiste auf das Symbol Admin.
- Klicken Sie im Fenster Admin auf die Schaltfläche Benutzer. Der Bildschirm Benutzer öffnet sich.
- Klicken Sie in der Liste Name auf einen Benutzernamen. Der Bildschirm Benutzer bearbeiten öffnet sich.
Möglichkeiten
Change profile info for the user
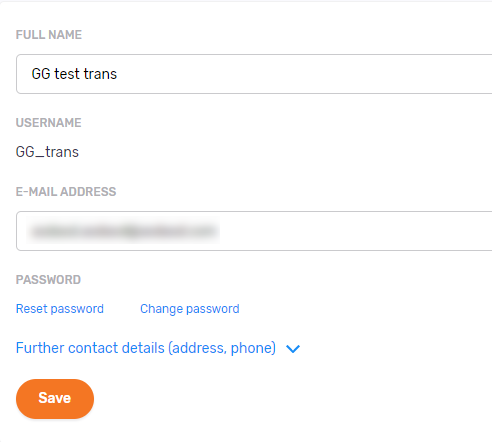
You cannot change the Username of the user. To change more details: Click the Further contact details (address, phone) link. Change the Mobile phone number, Phone number or Address of the user, as needed.
Reset or change the password for the user
To reset the user's password: Click the Reset password link. The memoQ server sends an email to the user, with a link to memoQWebNext's password reset page. When the user clicks that link, they can set their new password.
To change the user's password: Click the Change password link.
Type the new password into the Password field. To see what you are typing: Click the Show command on the right (only do this if nobody is watching your screen).
Erfüllt das Passwort die vom Systemadministrator festgelegten Kriterien, werden die grauen Punkte unten zu grünen Häkchen:
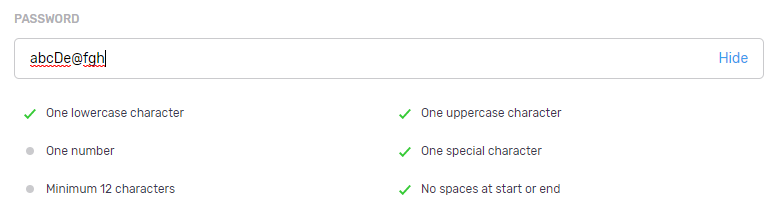
So speichern Sie Ihre Änderungen in diesem Abschnitt: Klicken Sie auf die Taste Speichern am unteren Rand des Abschnitts.
Change workflow and profile settings for the user
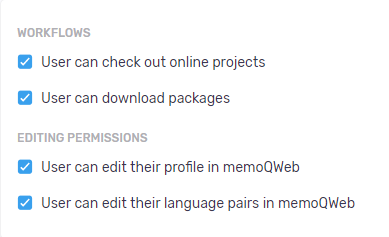
The two check boxes under Workflows allow the user to check out an online project or download a project package when they sign in to a memoQ server.
The two check boxes under Editing permissions allow the user to change their profile data or their language pairs when they sign in to memoQWebNext.
So speichern Sie Ihre Änderungen in diesem Abschnitt: Klicken Sie auf die Taste Speichern am unteren Rand des Abschnitts.
Change groups for the user
Berechtigungen in memoQ legen fest, ob ein Benutzer auf eine Ressource zugreifen kann und was er damit tun kann. Verwenden Sie Gruppen, um diesen Prozess zu erleichtern. Durch Gruppen können sie mehrere Benutzer gemeinsam verwalten: Hat eine Gruppe Zugriff auf etwas, haben auch alle ihre Mitglieder Zugriff darauf. Es ist viel einfacher einen neuen Benutzer zu einer Gruppe hinzuzufügen, als die einzelnen Benutzerberechtigungen zu ändern. Erhöhen Sie die Sicherheit, indem Sie Berechtigungen an Gruppen und nicht an einzelne Benutzer vergeben.
To change the groups the user is a member of: Click the Add/remove user to/from groups link. In the Add user to group window, check the check boxes of the groups you want to add the user to. Clear the check boxes of the groups you want to remove the user from. So speichern Sie Ihre Änderungen: Klicken Sie auf die Schaltfläche Anwenden. So verwerfen Sie Ihre Änderungen: Klicken Sie auf den Link Abbrechen.
Change language pairs for the user
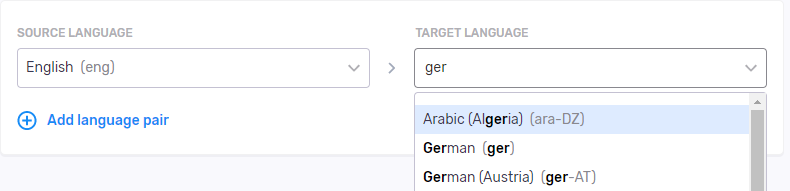
So fügen Sie eine weiteres Sprachpaar hinzu: Klicken Sie auf den Link Sprachpaar hinzufügen. Eine neue Zeile erscheint.
So löschen Sie ein Sprachpaar: Klicken Sie auf das Symbol Löschen ![]() rechts in der Zeile.
rechts in der Zeile.
Disable or delete the user

To prevent the user from signing in: Click the Disable user account link. To allow a user to sign in again: Click the Enable user account link.
To delete the user: Click the Delete user link. A warning window opens. Check the check boxes, and click the Delete user button.
Change more than one user at the same time
To get to the Edit users screen: On the Users screen, check the check boxes of the users you need to edit. Above the list, click the Edit users link.
To change a group of settings: Change the dropdown of those settings to Change (setting name) for selected users to this, and change the settings as needed. Leave all the other dropdowns unchanged.
To save your changes: Click the Update (number) users button.
To return to the Users screen without saving: Click the Cancel link.
Abschließende Schritte
Currently, memoQWebNext saves the changes you make to group memberships and language pairs.
To return to the Users screen without saving: Use your browser's Back button.