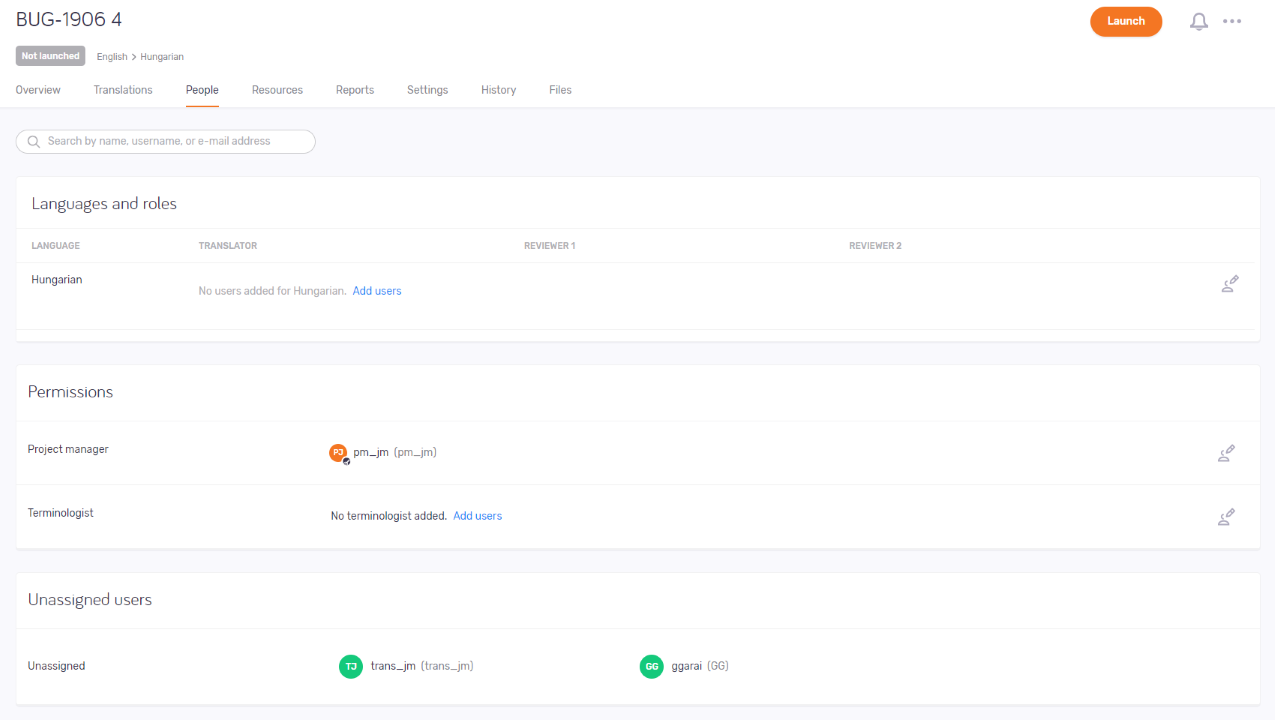
Project - People
Here you can manage the roles and permissions for users that are assigned to project. You can also assign users to the project as well.
How to get here
- Sign in to memoQWebNext as an administrator or a project manager.
- On the Active Projects list, click a project.
- Click the People tab.
What can you do?
Display the roles and permissions for a certain user
Use the search bar to find a specific user and learn which languages and roles have been assigned to it. You can also see the permissions granted to it.
You can use the name, username or e-mail address to perform the search. Type in the text in the search bar, and hit enter to display the results.
Modify language roles
To modify the roles for a certain target language, click the Modify language roles button in its row. The "Add users to" pane appears.
On the pane, you can see the users that are already added to the project, and the roles that are assigned to it.
To assign a role to a user, place a check mark at the role's column, in the row of the user. You can select multiple roles. To apply the roles, click Apply in the bottom of the pane.
Here you can also modify the roles of users that are already added to the target language. Select the roles that you wish the user should have, and click Apply in the bottom of the pane.
To revert the changes, click Cancel in the bottom of the pane.
To remove a user from a role, highlight the user and click the Remove user from role![]() button.
button.
To grant a desktop license for a user, highlight it and click the Grant desktop license![]() button. To revoke a license from a user, highlight it and click the Revoke desktop license
button. To revoke a license from a user, highlight it and click the Revoke desktop license ![]() button.
button.
Manage user permissions
To add a user as a project manager, click the Modify permission button in the Project manager row.
- You can search for a user with the search bar by name, username or e-mail address. To add the user that was the result of the search, check the bracket next to the name and click Apply in the bottom of the pane. Press cancel to close the pane and revert the changes.
- You can select one or multiple people from the users that are already added to the project. To add them, check the brackets next to their name and click Apply in the bottom of the pane.
- You can select one or multiple people from all the users that are present on the server. To add them, check the brackets next to their name and click Apply in the bottom of the pane.
To close the pane, click the X icon in the top right corner.
To remove a user from the project manager role, highlight the user and click the Remove user from role![]() button.
button.
To add a user as a terminologist, click the Modify permission button in the Terminologist row.
On the Add terminologist pane, you can add users in multiple ways:
- You can search for a user with the search bar by name, username or e-mail address. To add the user that was the result of the search, check the bracket next to the name and click Apply in the bottom of the pane. Press cancel to close the pane and revert the changes.
- You can select one or multiple people from the users that are already added to the project. To add them, check the brackets next to their name and click Apply in the bottom of the pane.
- You can select one or multiple people from all the users that are present on the server. To add them, check the brackets next to their name and click Apply in the bottom of the pane.
To close the pane, click the X icon in the top right corner.
To remove a user from the terminologist role, highlight the user and click the Remove user from role![]() button.
button.
To grant a desktop license for a terminologist, highlight the user and click the Grant desktop license![]() button.
button.
Assign users to roles
To reach these actions: In the top right corner, click the More options![]() menu.
menu.
- To download completed documents from the project: Click Export project. Your browser saves the files in a ZIP package into its regular "Downloads" folder.
To connect the project with a Customer Portal request: Click Link to customer request. In the Link to customer request window, choose the request from the dropdown.
To continue: Click the Link project button. To discard your changes: Click the Cancel link.
Works only if there are requests not linked to projects on the memoQ server. Else, the dropdown is empty. Learn more about requests here.
To archive a project and move it into the Archived projects list: Click Archive. To open an archived project, you need to restore it from the archive.
On the Archive project window, set the file name template. To insert a placeholder: Click the Insert link, and choose a placeholder from the list.
To continue: Click the Archive project button. To discard your changes: Click the Cancel link.
To remove the project and move it to the Projects in trash list: Click Move to Trash. There, you can restore or permanently delete the project.
There is no confirmation window: When you click Move to Trash, the project is removed, and you return to the Active projects list.
To open the project in the memoQ desktop app: Click Continue in memoQ.
To create a local copy of the project: Click the Check out project button. In memoQ, the Project home - Translations tab opens.
To open the online project for management: Click the Manage project button. The memoQ online project - Translations tab opens.
When you launch an online project, you start its notification chain: memoQ server sends an initial e-mail to all participants. The e-mail contains details about accessing the online project. Later, when there is a change in the workflow status of a document, memoQ server sends further e-mails to the participants and the project manager.
To launch a project: In the top right corner, click the Launch button. The word Launched with a blue background will appear under the project's name. You cannot undo launching a project.
You wrap up a project if you do not expect any more work on it. If you use project templates, you can set up automatic actions that happen when you wrap up the project.
Set up templates in the memoQ desktop app. Then, you can create projects using those templates in memoQWebNext. To learn more, see the topic about editing project templates.
To wrap up a launched project: In the top right corner, click the Wrap up button. To continue: Click the Wrap up project button. To close the confirmation window without wrapping up the project: Click the Cancel link. You cannot undo wrapping up a project.
To see project-related notifications: In the top right corner, click the bell icon (![]() ). In the Notifications pane, you can see notifications about missed deadlines, failed automatic actions, lost content connection, etc.
). In the Notifications pane, you can see notifications about missed deadlines, failed automatic actions, lost content connection, etc.
To remove a notification from the list: Click the Dismiss link under it. To remove all notifications: Above the list, click the Dismiss all link.
To close the pane, click the X icon.