Install Content connector
This page describes how you can install memoQ Content connector on a server computer.
Before you install memoQ content connector: Plan the installation and make sure that your system meets all the requirements.
Navigation
- Log in to the server computer through Remote Desktop.
- if necessary, download the memoQ server setup package. To learn how: Read the Deploy Content connector topic.
- If memoQ server is already installed: open the Start screen or the Start menu by pressing the Windows key.
- Type memoQ, and wait for the results to appear.
- In the list, click memoQ Server Deployment Administration.
- Windows may ask you to confirm to run the program. Click Yes or Run.
- The memoQ Server Deployment Administration window opens. You need the fourth section from the top (Content connector).
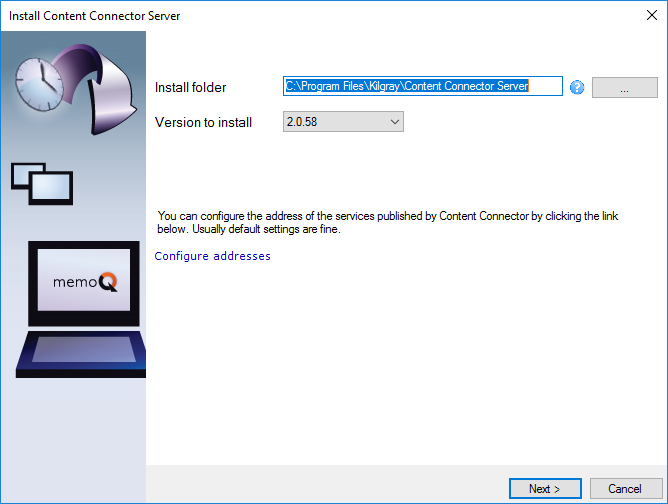
- In the Content connector section, click Install Content Connector. The Install Content Connector Server wizard opens:

Möglichkeiten
- In the first screen you can change the folder where the service will be installed, and you can al-so choose the version if more than one different versions were downloaded previously. Nor-mally, you can leave these settings as they are.
Do not click Next at this point: You need to check or set the address where the Content connector service will be available, and where it can be reached from.
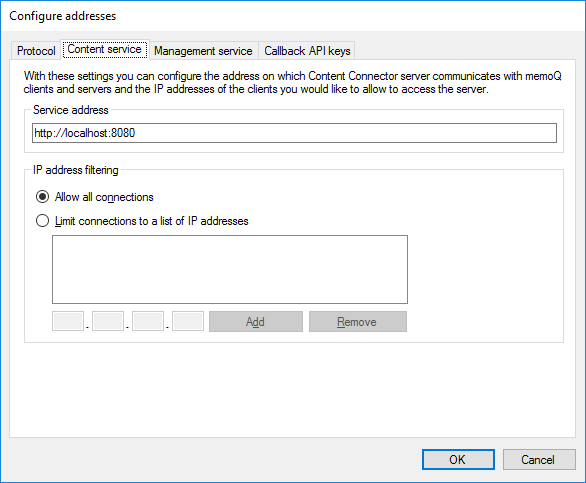
- Stay on the first page of the Install Content Connector Server wizard, and click Configure addresses. The Configure addresses window opens:

The Content Connector service has two connections: one for memoQ or memoQ server – where it sends contents and receives translated results –, and another for management where it allows the Content connector client application to set up connections and change the settings of the service.
- On the Content service tab of the Configure addresses window, configure where memoQ or memoQ server can reach the service. Use the address ‘localhost’ only if memoQ or memoQ server is on the same computer as the Content connector service. Otherwise, always use a domain name such as ‘contentserver.mycompany.com’. Normally, the service listens on TCP port 8080, this is why the default address ends in ‘:8080’. You can change this to a different port by simply typing a different number here, but you must make sure that the firewall has that other port open. (Even with 8080, you might need to open the Windows Firewall with Advanced Security program to enable the port.)
- It is also highly recommended to protect the Content connector from unwanted access. If the Content connector will be used by one or just a few memoQ servers, always list their IP addresses here. On the Content service tab, click the Limit connections to a list of IP addresses radio button. Add the IP addresses one by one: type one at a time in the boxes below the list. Click Add, then repeat this until there are no more IP addresses.
- On the Management service tab, you can set up an address for management access separately. The Content connector client application will use this connection. This program can be installed on the same computer as the Content Connector service itself. For maximum security, you may need to do this and leave the ‘localhost’ address as it is. In addition, you will probably manage the service from just one or two computers: it is recommended that you restrict the management access to those.
To learn more: Read the Secure the connection to Content connector and the Configure addresses topics.
- To return to the Install Content Connector Server wizard: Click OK. In the wizard, click Next.
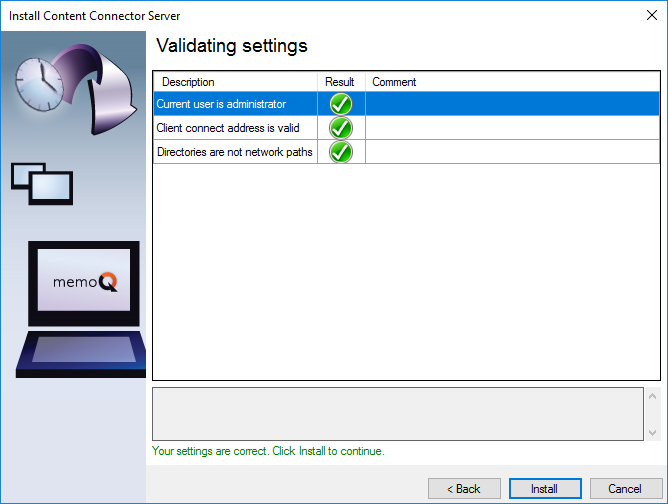
- The second screen appears where the settings are validated:

- If everything is green here, click Install to proceed. If any of the items has a (red) warning, click Back, and review your settings.
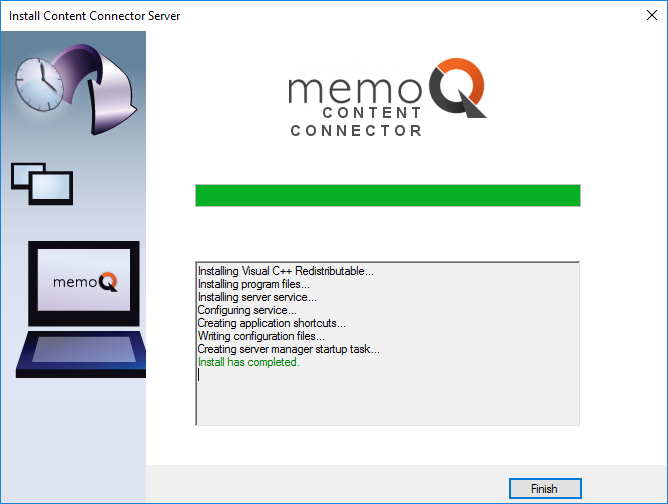
- The Content Connector service is installed, and when it is done, the wizard reports success:

Install a custom content connector
If memoQ's Business Services created a content connector for your own special needs, you get an installer script with the connector. To install your connector: Run that script on your memoQ server computer. The connector will be installed in a separate folder under C:\Program Files\memoQ\Content Connector.
Abschließende Schritte
The Content connector client is not installed together with Content connector: You need to download it from memoQ's Downloads page (click the Tools and utilities tab). To run the Content connector client only, you do not need a memoQ license.
After you install memoQ Content connector, you need to activate it. To do that, first you need a license.
To learn how: Read the Activate Content connector topic.