

Configure database
This tool helps system administrators migrate memoQ TMS's database.
Don't make changes unless you have experience operating computer networks, and everything written here is clear to you.
How to get here
When you do this, memoQ TMS will already be installed on the server computer.
- Log in to the memoQ TMS server computer through Remote Desktop.
-
Windows may ask you to confirm to run the program. Click Yes or Run.
-
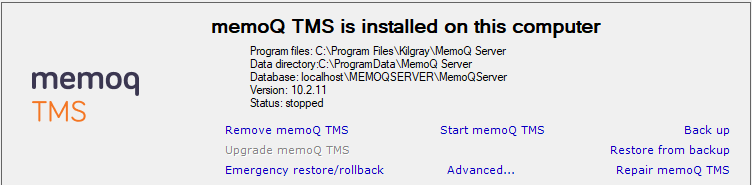
The memoQ TMS deployment tool window opens.
-
Click Stop memoQ TMS. Wait until memoQ TMS stops.
-
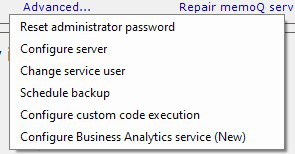
Click Advanced:
-
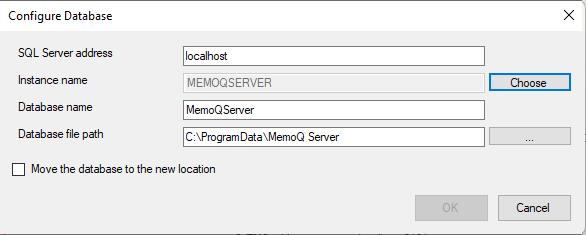
From the menu, choose Configure database. This window opens:
What can you do?
If the new database is in the same SQL server instance, start with step 3.
-
In the Configure database window, next to Instance name, click Choose.
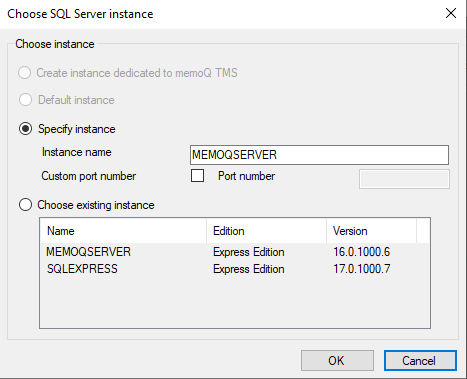
The Choose SQL Server instance window opens:
-
Specify the database instance where the new database is:
-
For a local database instance, select Choose existing instance, and click an instance in the list.
-
For a remote instance, enter its name (for example, dbserver\DBINSTANCE) in the Instance name field.
If the instance is available via a specific port, select the Custom port number checkbox, and fill in the Port number field.
-
-
In the Configure database window, change the Database name and Database file path as needed.
-
If the new database already exists (for example, memoQ Support created it for you, leave the Move the database to the new location checkbox empty. If there is no new database yet, select this checkbox.
-
Click OK. A validation window opens, and tells you if anything needs fixing before the migration. If every row has a green check mark, click Continue.
-
The tool shows what happens during the migration.
When you finish
When the migration is ready, click Finish.