Term base export
You can export Qterm term bases into various formats.
How to get here
- Open memoQweb in a web browser. Log in as an administrator, project manager, terminologist, or external user.
- Click the Qterm tab. The Qterm - Home page appears.
- In the list, find the term base you want to export.
-
In the term base's row, in the Operations column on the left, click the Export
 icon. The Term base export wizard opens.
What can you do?
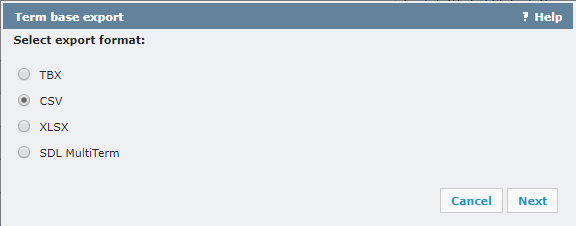
Select the TBX option and click Next. The Export options page appears:

To include Qterm-specific metadata (e.g. the Case sensitivity, Matching, or Forbidden fields) in the exported file: Check the Export Qterm-specific metadata checkbox.
To leave out these metadata from the export: Clear the Export Qterm-specific metadata checkbox.
- To return to the format selection page: Click Back.
- To close the wizard without exporting anything: Click Cancel.To close the wizard without exporting anything: Click Cancel..
- To export the term base: Click Export.
Select the CSV option and click Next. The Export options page appears:
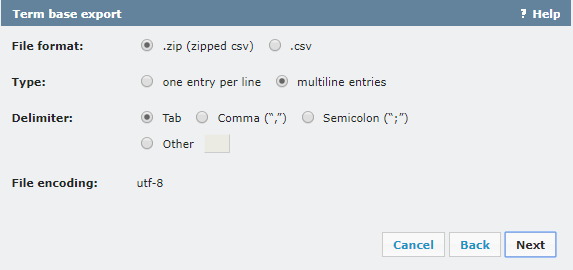
In the File format setting, choose if you want to download the export file zipped or not.
In the Type setting, choose how to arrange entry data:
-
To have all data for one entry in one line: Choose the one entry per line option. The export file will look like this:

-
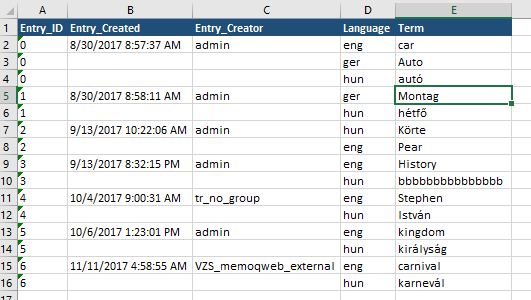
To have each term in a separate line: Choose the multiline entries option. The export file will look like this:
In the Delimiter setting, choose the character that separates entries in the CSV file. If you choose Other, enter the delimiter in the text field next to the Other radio button.
The Encoding setting is always utf-8.
- To return to the format selection page: Click Back.
- To close the wizard without exporting anything: Click Cancel.
- To go to the language selection page: Click Next.
The Select term base languages to be exported page appears:
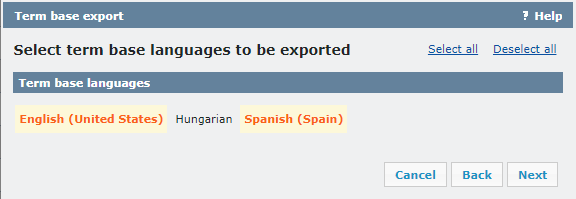
By default, all languages in the term base are selected. Click the languages you want to leave out.
To select or deselect all languages, in the upper right, click the Select all or Deselect all link.
Note: You need to select at least 2 languages.
- To return to the type selection page: Click Back.
- To close the wizard without exporting anything: Click Cancel.
- To go to the metadata selection page: Click Next.
The Select metadata to be exported page appears:
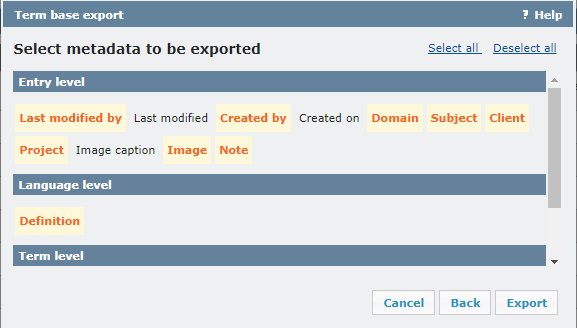
By default, all metadata fields in the term base are selected. Click the fields you want to leave out.
To select or deselect all fields, in the upper right, click the Select all or Deselect all link.
- To return to the language selection page: Click Back.
- To close the wizard without exporting anything: Click Cancel.
- To export the term base: Click Export.
Select the XLSX option and click Next.
The Type page appears:

-
To have all data for one entry in one line: Choose the one entry per line option. The export file will look like this:

-
To have each term in a separate line: Choose the multiline entries option. The export file will look like this:

- To return to the format selection page: Click Back.
- To close the wizard without exporting anything: Click Cancel.
- To go to the language selection page: Click Next.
The Select term base languages to be exported page appears:

By default, all languages in the term base are selected. Click the languages you want to leave out.
To select or deselect all languages, in the upper right, click the Select all or Deselect all link.
Note: You need to select at least 2 languages.
- To return to the type selection page: Click Back.
- To close the wizard without exporting anything: Click Cancel.
- To go to the metadata selection page: Click Next.
The Select metadata to be exported page appears:
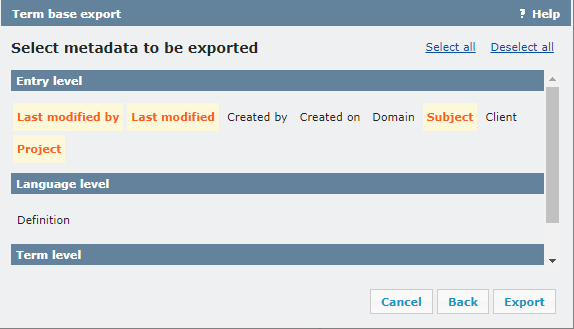
By default, no metadata fields in the term base are selected. Click the fields you want to include.
- To select or deselect all fields: In the upper right corner, click the Select all or Deselect all link.
- To return to the language selection page: Click Back.
- To close the wizard without exporting anything: Click Cancel.
- To export the term base: Click Export.
Select the SDL MultiTerm option and click Next.
The Select term base languages to be exported page appears:

By default, all languages in the term base are selected. Click the languages you want to leave out.
To select or deselect all languages, in the upper right, click the Select all or Deselect all link.
Note: You need to select at least 2 languages.
- To return to the language selection page: Click Back.
- To close the wizard without exporting anything: Click Cancel.
- To go to the metadata selection page: Click Next.
Choose what metadata you want to export, and choose which MultiTerm fields will store the Qterm metadata.
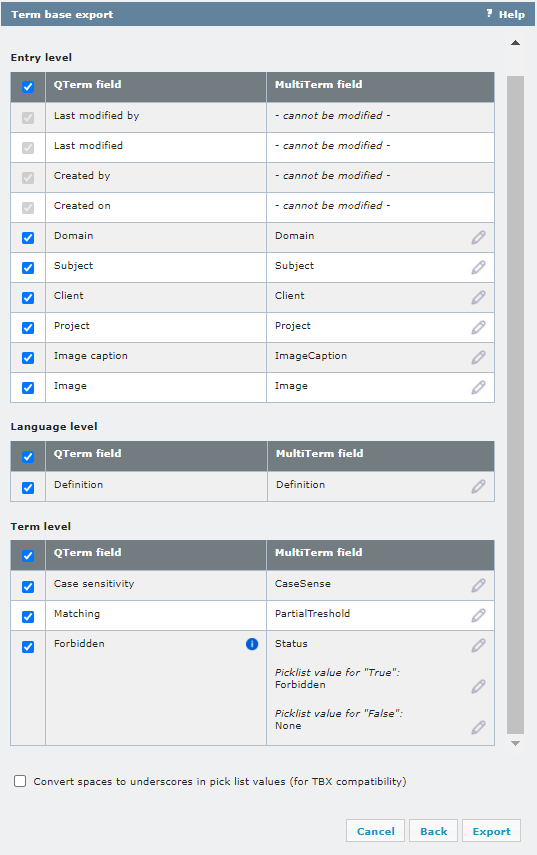
If there are forbidden terms in the Qterm term base, always use the settings in the image above: map Qterm's Forbidden field to a picklist named Status, with the field values Forbidden for “True” and None for “False”.
By default, all metadata fields in the term base are selected. Deselect the fields you want to leave out.
To select or deselect all fields on the Entry, Language, or Term level: In the top row of that table, check or clear the checkbox.
To rename a field: In its row, click the Edit ![]() icon and type in the new name to the text field.
icon and type in the new name to the text field.
To make the exported term base TBX compatible: Select the Convert spaces to underscores in pick list values checkbox.
- To return to the language selection page: Click Back.
- To close the wizard without exporting anything: Click Cancel..
-
To export the term base: Click Export.
If no metadata fields are selected, the Export button is disabled, and you cannot export the term base.
When you finish
On the last page, click the link to download the exported file, then click Close.