Finishing up and exporting translation
The translation is finished when all segments are confirmed
Once you fill in and confirm every segment in the document, the translation is finished. At the bottom of the memoQ window, you can see how far you got:
The letter P means the whole project. If you need to translate several documents, your project isn’t over when one document is complete.
The letter D means the current document. When the percent value next to D becomes 100%, the document is finished, and you can export it – after some final checks.
When the percent value next to P becomes 100%, all documents in the project are translated. But there may still be a few things to do.
Mind the warnings, especially about tags
It’s not enough to have all segments confirmed. The document should be as free of warnings as possible. You see a warning whenever memoQ puts an orange lightning sign next to a segment.
![]()
A warning can be about missing numbers and tags, but it can also indicate missing or mismatched punctuation, or a missing translation for a term. To learn more about a warning, double-click the lightning sign. A little window appears with the information you need:
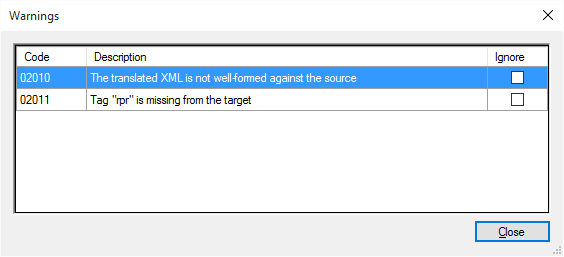
There is one type of warning you should always solve: the one about tags, like in the example above. As a general rule, you need to make sure that every single tag in the source text has its copy in the translation.
To delete a tag, simply place the cursor next to it, and press Backspace or Delete. To copy a tag, place the cursor (in the translation) where the tag belongs, and press F9. Note that memoQ will always copy the first tag that is still missing from the translation.
Check the spelling of your translation
If the spell checker is set up for the target language of your project, memoQ will underline the problematic words – the same way as Microsoft Word does. When you see a word with a red curly underline, right-click it:
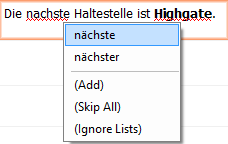
memoQ will list the possible corrections, and a few options. If the right word is on the list, just click it: memoQ will replace the word in the text, and the curly underline will go away.
If you are sure the word is correct, and you just want to clear the underline, click Skip all. If you want memoQ to accept this word in the future, click Add.
You can also make memoQ ignore this word in the future, but you will need to use ignore lists for that. Normally, a memoQ project doesn’t come with an ignore list.
To learn more about ignore lists, see the memoQ documentation about spell checking and ignore lists.
Say Export
When all is done, export the document. If the document is still open, click the Documents ribbon tab, and then click the Export icon:

memoQ will save the translation in a file. It will be the same file type and it will look the same as the source document – give or take a few places where the translated text is too much or too little to fit or fill the space in the original format.
The exported document is saved in the folder where the source document comes from. The name of the document will be different because memoQ adds the code of the target language:

The source document is called ‘nextstop_EN’ and the exported translation ‘nextstop_EN_ger’.
You know when the document is exported because memoQ will open it in Windows. If it’s a Microsoft Word document, it will open in Microsoft Word.
You can close the document, and return to Translations
You can export a document from the Translations list, too:
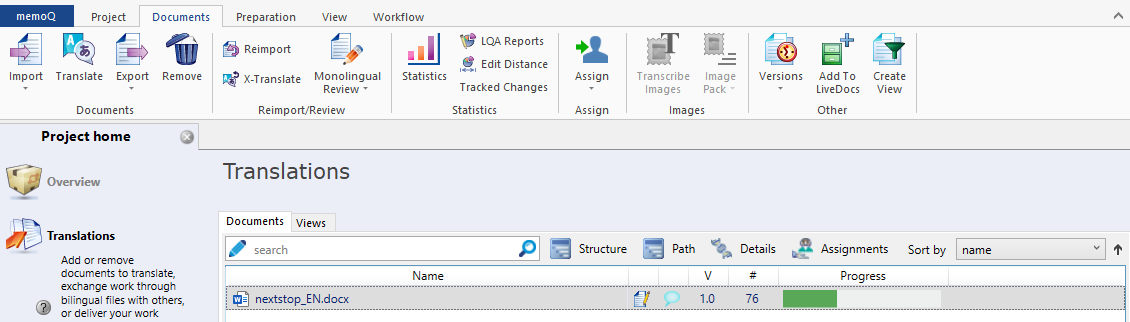
Click the name of the document, and on the Documents ribbon, click the Export icon. If you click the little arrow at the bottom of the icon, memoQ offers more options to export the document.
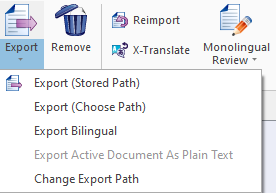
From these choices, click Export (Stored Path): that will save the exported translation in the folder where the source comes from.
You can back up a project from the Dashboard
For safety, you can back up your projects. When you back up a project, memoQ saves a single file with the .mqbkf extension. You can restore projects from these files on another computer (or, for example, on the same computer, if you had to wipe and reinstall it).
To back up a project, select it on the Dashboard, and, on the Project ribbon, click Back Up.
There is more about managing documents and getting around in a project: See the documentation, and explore the related topics.