Neue Termdatenbank
You can create a new term base using this wizard.
Navigation
- Öffnen Sie memoQweb (legacy) in einem Webbrowser. Melden Sie sich als Administrator, Projekt-Manager, Terminologe oder externer Benutzer an.
- Klicken Sie auf die Registerkarte Qterm. Die Seite Qterm - Home wird angezeigt.
- Above the term base list, in the right corner, click Neue Termdatenbank
 . The Neue Termdatenbank wizard appears.
Möglichkeiten
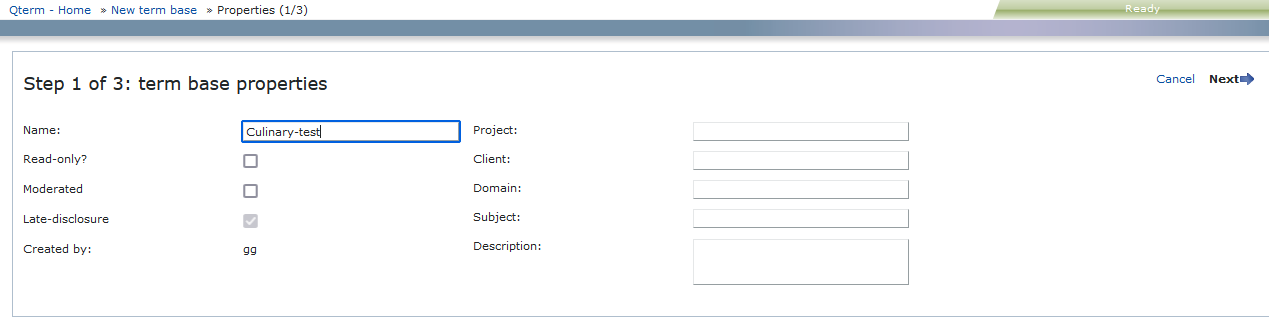
Page 1 - properties:
Hier können Sie:
-
Fill in the information fields as needed. The Name field is required.
-
Make the term base read-only: Aktivieren Sie das Kontrollkästchen Schreibgeschützt?.
-
Create a moderated term base:
Wenn ein Übersetzer oder ein Überprüfer der Termdatenbank eine neue Benennung hinzufügt, wird diese normalerweise sofort für alle anderen Benutzer sichtbar, die die Termdatenbank verwenden.
In manchen Fällen, vor allem wenn der Endkunde Wert auf Terminologie legt, muss dies genauer geprüft werden. Ein Unternehmen kann einen Terminologen einsetzen, der neu hinzugefügte Benennungen bestätigen kann. In diesem Fall werden neue Einträge für andere Benutzer erst sichtbar, nachdem sie vom Terminologen bestätigt wurden. Für diesen Fall müssen Sie eine moderierte Termdatenbank festlegen.
So legen Sie die neue Termdatenbank als moderierte Termdatenbank fest: Aktivieren Sie das Kontrollkästchen Moderated.
Normalerweise werden neue Einträge erst angezeigt, nachdem sie vom Terminologen bestätigt wurden. Die Einträge können jedoch auch sofort in der Termdatenbank angezeigt werden. In diesem Fall werden einige neue Einträge nicht mehr angezeigt, wenn der Terminologe sie nicht bestätigt.
So legen Sie fest, dass Einträge sofort in einer moderierten Termdatenbank angezeigt werden: Deaktivieren Sie das Kontrollkästchen Verzögerte Mitteilung.
-
Go to page 2 (languages): In the upper right corner, click Weiter.
-
Close the wizard and return to the Qterm - Home screen without creating the term base: In the upper right corner, click Abbrechen.
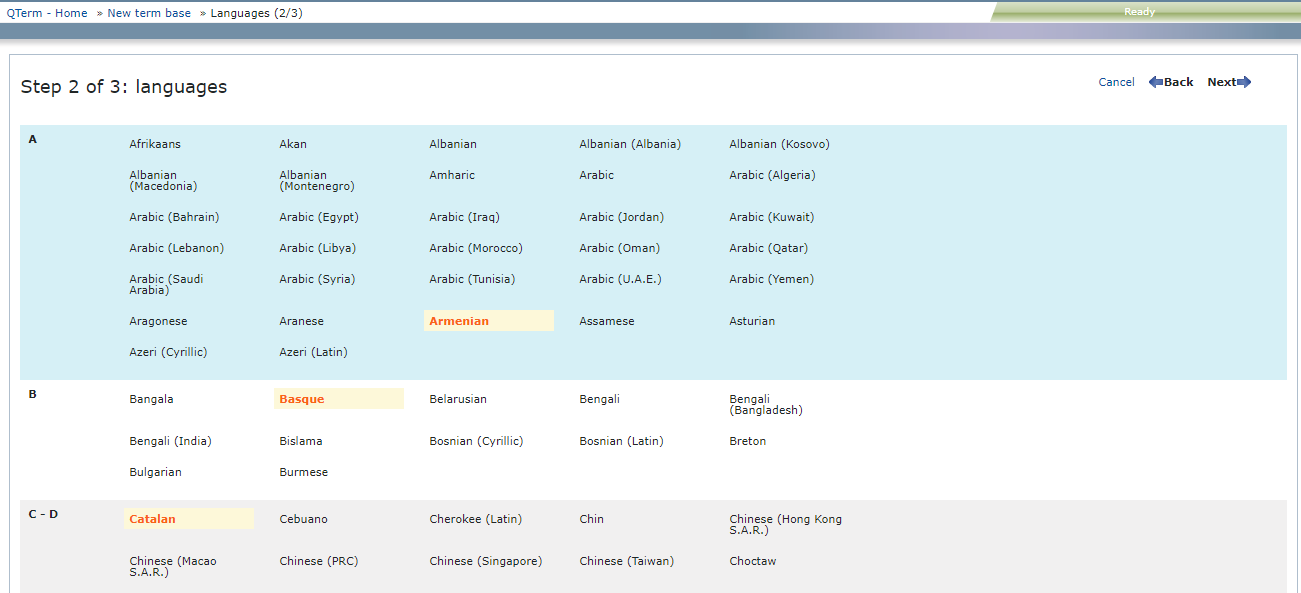
Page 2 - languages:
Hier können Sie:
-
Select the languages you want to include in the term base.
-
Go back to page 1 (properties): In the upper right corner, click Back.
-
Go to page 3 (definition): In the upper right corner, click Weiter.
-
Close the wizard and return to the Qterm - Home screen without creating the term base: In the upper right corner, click Abbrechen.
Page 3 - definition:
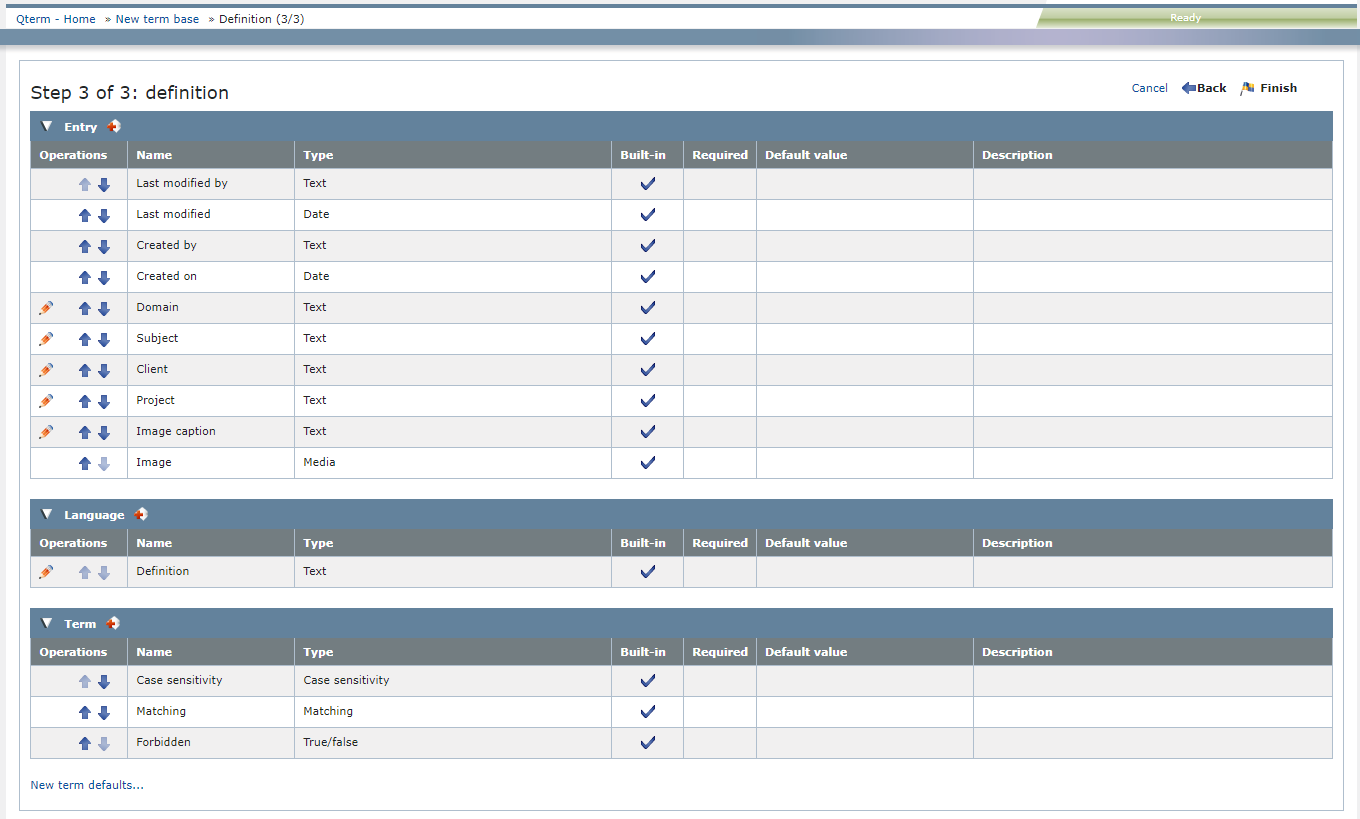
Here, you can:
-
Edit a field: In the field's row, in the Vorgänge column, click the Bearbeiten
 icon. Make your changes and click the Save
  icon.
icon.Edit text fields marked as Integriert: You can edit some entry-level and language-level built-in fields: set them as required, and add a default value if needed. Users see an asterisk (*) next to the names of required fields. The editable built-in fields have a pencil icon in the Vorgänge column.
-
Sort the fields: Click the Nach oben
 and Nach unten
  arrows to sort the term-level, language-level and entry-level terms as needed. Users need to sign in again to see the term fields in the order you set.
 -
Delete a field: In the field's row, in the Vorgänge column, click the Löschen
 icon.
icon. -
Choose the default matching and case sensitivity settings for all new entries in a term base: Klicken Sie auf den Link Neue Standardbenennungen.
-
Add a new field: Click the Neu hinzufügen
 icon in one of the field level headers (Eintrag, Sprache, or Benennung). A new row appears under the list you clicked:
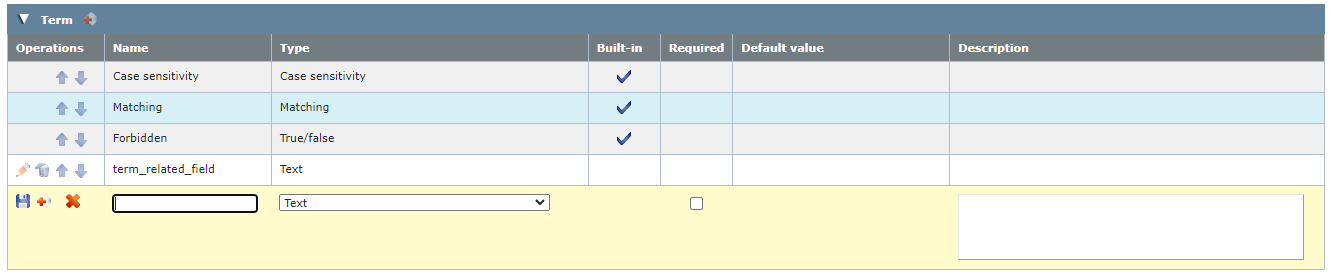
 When adding a new field, you can:
-
Enter the name of the new field in the Name column.
-
Choose the type of the new field in the Type column.
Possible types are:
- Text: You can put any text in this field.
- Zahl: You can put only a number in this field.
- TRUE/FALSE: The field's value can be true or false, indicated by a check box.
- Datum: You can put only a number in this field.
- Medien: You can upload media content such as sounds, graphics, videos in this field.
- Auswahlliste (eine Option): You can choose one value from a list of defined values (for example, a term's status can be Draft, Approved, or Published). Separate picklist values with a semicolon (;), and do not use spaces in them.
- Auswahlliste (mehrere Optionen): You can choose one or more values from a list of defined values (for example, the geographic region where the term is used can be both Europe and Asia). Separate picklist values with a semicolon (;), and do not use spaces in them.
- Enter a value in the field under Auswahlliste and click the
 icon next to it. The value appears in the list below. Repeat this step for each value you want to add.
 - Use the
 and
and  icons to move list items up and down.
 - Use the icon to remove list items.
For Auswahlliste type fields, define the possible values:
-
To mark the field as required (one that cannot be left empty): Check the check box under the Erforderlich column, and choose a default value.
Text fields do not need a default value: You can save these fields as required without entering anything in the Standardwert text box.
-
To save the field and go on: Click the Save icon
on the left.To save the field and add another one: Click the Speichern und neuen hinzufügen icon
on the left.To cancel your changes without adding the field: Click the Abbrechen icon
 on the left.
-
Abschließende Schritte
To return to Page 2: In the upper right corner, click Back.
To create the term base and return to the Qterm - Home screen, in the upper right corner, click Finish.
To close the wizard and return to the Qterm - Home screen without creating the term base, in the upper right corner, click Abbrechen.
So kehren Sie zum Bildschirm Qterm - Home zurück: Klicken Sie rechts oben auf Qterm - Home.
So melden Sie sich von Qterm ab: Klicken Sie in der oberen Zeile auf Abmelden.