Create new LiveDocs settings
LiveDocs settings tell memoQ how to get matches from LiveDocs corpora. This means two things:
- Match thresholds. These are two numbers: One of them sets the minimum match rate of any match that memoQ shows. The other tells memoQ what counts as a good match. (You can pre-translate documents with good matches or better. That's where memoQ uses this second number.)
- Penalties: A match is not always reliable. The match rate is supposed to tell how much you need to work on the translation you got. But it can actually be worse if the translation is bad, or - in the case of LiveDocs - comes from an aligned document pair, and there is a misalignment. For these cases, you use penalties - so that the match rate will be lower than memoQ originally computed.
To learn more about penalties, see the topic about editing LiveDocs settings.
You cannot edit the default LiveDocs settings. Either you need to make a copy of the default LiveDocs settings profile, or you need to create a new one.
Belongs to a project, not to a LiveDocs corpus: You choose a LiveDocs settings profile for a project, not for a LiveDocs corpus. If you choose a LiveDocs settings profile for a project, memoQ uses them for all LiveDocs corpora in the project. Then again, in a different project, you can use different LiveDocs settings for the same LiveDocs corpora.
Default LiveDocs settings: A new LiveDocs settings profile is set to the default match thresholds and penalties. You need to edit it if you need different settings.
How to get here
Open the Resource Console. Choose LiveDocs settings. Under the list, click Create new.
From a project: Open a project. In Project home, choose Settings. In the Settings pane, click the LiveDocs icon. (This icon is two jigsaw puzzle pieces, one yellow, one grey.) Under the list, click Create/use new. This command creates the LiveDocs settings profile, and adds it to the project.
From an online project: Open an online project for management. In the memoQ online project window, choose Settings. In the Settings pane, click the LiveDocs settings icon. (This icon is two jigsaw puzzle pieces, one yellow, one grey.) Under the list, click Create/use new. This command creates the LiveDocs settings profile, and adds it to the project.

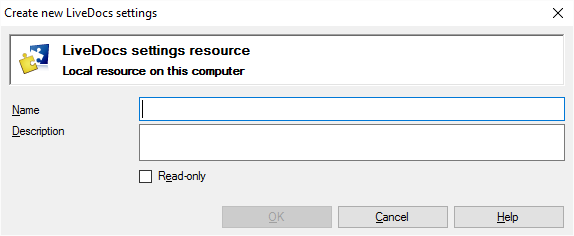
If My Computer is selected in Resource Console

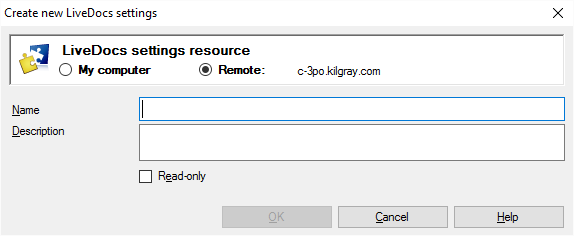
If a memoQ server is selected in Resource Console, even if you come from a local project
What can you do?
If you come from the Resource Console, and a memoQ server was selected at the top: You can choose to create the LiveDocs settings profile on your own computer; or to create it on the server.
To make your choice: Click the My computer or the Remote radio button.
You cannot choose another server here. To create the LiveDocs settings profile on another server: Close this window. Choose the other server at the top of the Resource Console. Click Create new again.
- Type a name in the Name box. The name must be unique on your computer - or on the server where you're creating it.
- Describe the purpose of the LiveDocs settings profile in the Description box. Never leave it empty: think of the other people who may need to use this LiveDocs settings profile, too.
- To protect the LiveDocs settings profile against accidental changes: Check the Read-only check box. memoQ won't let anyone make changes to it - until you clear the Read-only check box in the Properties window for the LiveDocs settings profile.
When you finish
To create the LiveDocs settings profile: Click OK.
To return to the Resource Console or to Project home, and not create a LiveDocs settings profile: Click Cancel.