Administration - Users - Edit user
You can edit a user account from the memoQ TMS here.
How to get here
- Log in to memoQweb as an administrator.
- On the left sidebar, click the Admin
 icon.
icon. - In the Name list, click a username. The Edit user screen opens.
What can you do?
Change profile info for the user
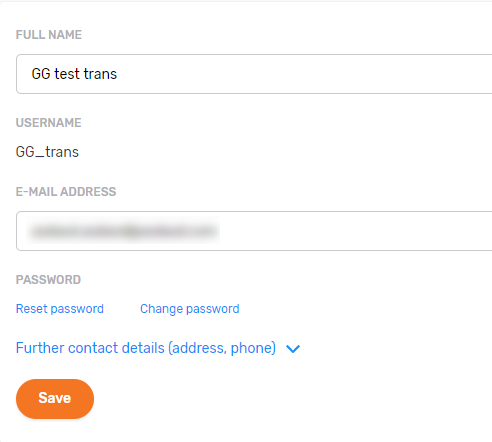
You cannot change the Username field's value. To change more details: Click the Further contact details (address, phone) link. Change the Mobile phone number, Phone number or Address of the user as needed.
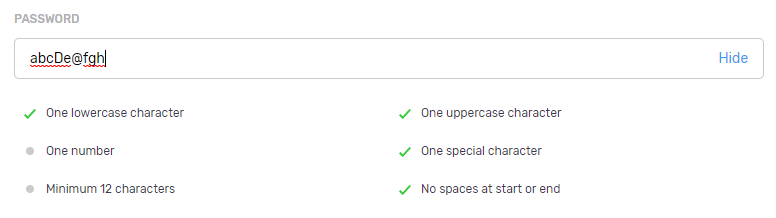
Reset or change the password for the user
To reset the user's password: Click the Reset password link. The memoQ TMS sends an email to the user, with a link to memoQweb's password reset page. When the user clicks that link, they can set their new password.
To change the user's password: Click the Change password link.
Type the new password into the Password field. To see what you are typing: Click the Show command on the right (only do this if nobody is watching your screen).
Change workflow and profile settings for the user

The radio buttons under Workflows allow the user to check out an online project or download a project package when they sign in to a memoQ TMS.
The two checkboxes under Editing permissions allow the user to change their profile data or their language pairs when they sign in to memoQweb.
Change groups for the user
To change the groups the user is a member of: Click the Edit group memberships link. In the Add user to group window, check the check boxes of the groups you want to add the user to. Clear the checkboxes of the groups you want to remove the user from.
If the list is too long: Above the list, start typing into the search bar. You will only see items that match the characters you typed.
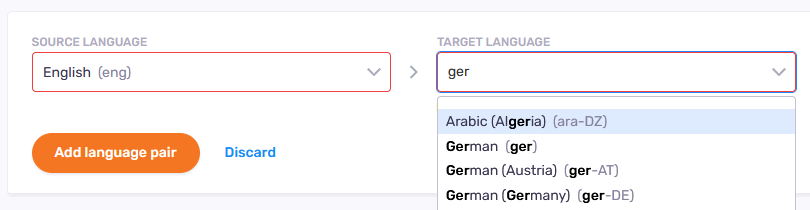
Change language pairs for the user
Disable or delete the user. Approve or reject an OIDC SSO registration.
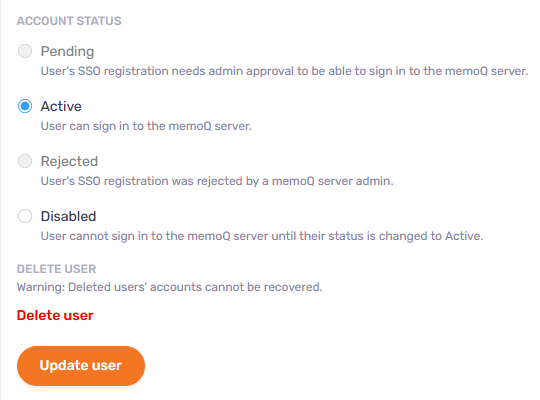
To prevent the user from signing in: Click the Disabled radio button, then the Update user button. To allow a user to sign in again: Click the Active radio button, then the Update user button.
To delete the user: Click the Delete user link. A warning window opens. Select the checkboxes, and click the Delete user button.
To approve a user's SSO registration: Change the user's Account status from Pending to Active, then click the Update user button.
To reject a user's SSO registration: Change the user's Account status from Pending to Rejected, then click the Update user button.
Change more than one user at the same time
To get to the Edit users screen: On the Users screen, select the checkboxes of the users you need to edit. Above the list, click the Edit users link.
To change a group of settings: Change the dropdown of those settings to Change (setting name) for selected users to this, and change the settings as needed. Leave all the other dropdowns unchanged.
To change group memberships: From the dropdown, choose Change group membership setting for selected users to this, and click the Edit group memberships link.
If the selected users are members of different groups, this might result in unwanted changes to their group memberships. Don't do this - unless you really need to.
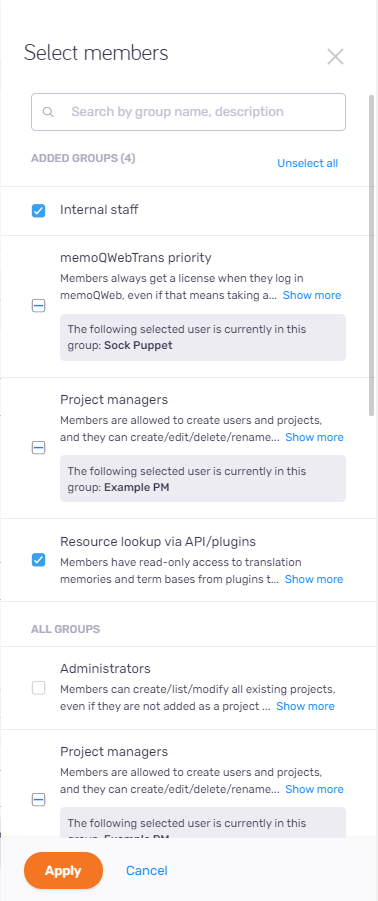
On the Select members pane, the Added groups section shows what groups the users belong to. The All groupssection shows all the groups on the server. To search groups by name or description: Type something into the search bar above the group list. To learn more about the groups: Click the Show more link.
-
A blue check mark means that every selected user is part of that group. To remove them from the group: Click the check mark.
-
A blue minus icon means that some of the selected users are part of that group. To add all selected users to the group: Click the blue minus icon. It turns into a check mark. To remove the selected users from the group, click the check mark icon. To undo your changes: Click the empty checkbox of the group in the All groups section.
-
An empty checkbox means that none of the selected users are part of the that group. To add the selected users to the group: Check its checkbox.
To save the membership changes, click Apply.
To change account status: In the Account status section, click a radio button as needed. This way, you can also approve or reject two or more OIDC SSO registrations at the same time.
Only users with the same status: You cannot change different account statuses here.
To save all your changes to the selected users: Click the Update (number) users button.
To return to the Users screen without saving: Click the Cancel link.
When you finish
Currently, memoQweb saves the changes you make to group memberships and language pairs.
To return to the Users screen without saving: Use your browser's Back button.