Configure content connector
-
Open the memoQ content connector server manager program.

-
If the content connector service is running, click the Stop button.
-
Click the Configuration button.
The memoQ content connector configuration window opens.
The content connector accepts connection from two systems:
-
From memoQ TMS - to import and export translations. This is the Content service;
-
From the memoQ content connector client program - to create and manage connections. This is the Management service.

-
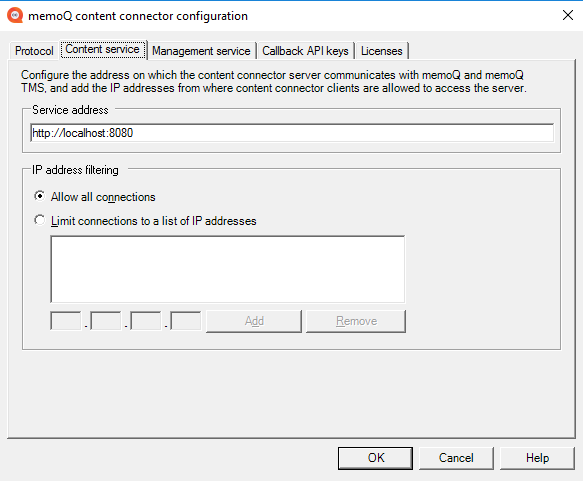
Click the Content service tab.
-
On the Content service tab, configure where a memoQ or memoQ TMS instance can reach content connector. Use the address localhost only if memoQ or memoQ TMS is on the same computer as the content connector service. Otherwise, always use a domain name such as contentserver.mycompany.com.
-
Normally, the service listens on TCP port 8080, this is why the default address ends in :8080. To change this, type a different number here. Make sure that the server's firewall has that port open. (Even with 8080, you might need to enable the port in the firewall.)
-
It is also highly recommended to protect the content connector from unwanted access. If the content connector will be used by one or just a few memoQ TMS instances, always list their IP addresses here. On the Content service tab, click the Limit connections to a list of IP addresses radio button. Add the IP addresses one by one: type one at a time in the boxes below the list. Click Add, then repeat this for each memoQ TMS IP address.
-
If you do not configure anything else, click the OK button.
On the Management service tab, you can set up an address for management access separately. The content connector client application will use this address to create or edit content connections.
For maximum security, it is recommended to install this program on the same computer as the content connector service itself, and leave the localhost address as it is. Otherwise, you should list the IP addresses of all the computers from where somebody will manage content connector connections.
To protect the content connector from unauthorized access, it is also recommended to require an API key from content connector client. If you set up an API key, a content connector client must have the same API key to be able to manage the service.
To learn more: Read the Secure the connection to content connector topic.
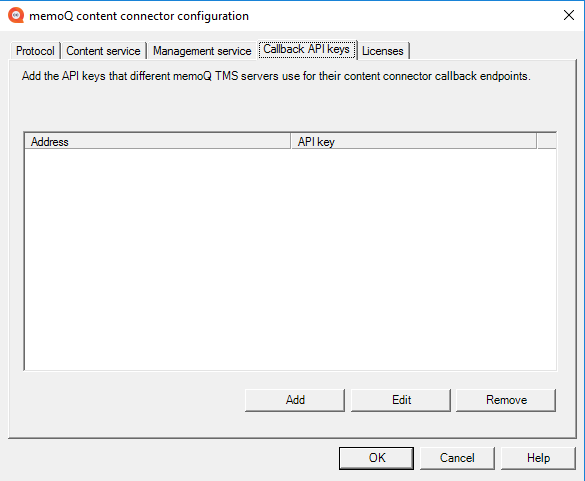
memoQ content connector can alert memoQ TMS about the changes in the content source. To do that, content connector needs to call memoQ TMS through its programming interface (API).
If the WS API of the memoQ TMS is protected, content connector may need an API key so that the memoQ TMS can verify that it can make the call.
To set this up in memoQ TMS: Use the Configure server window in the Deployment tool. On the content connector callback tab, you can allow content connector to connect, enable HTTPS, and set an API key.
You must use the same API key here in the memoQ content connector configuration window.
To set up the API keys, click the Callback API keys tab. You can enter the API keys of several memoQ TMS instances because all of them can get content from one content connector.

-
To add a memoQ TMS and an API key, click Add. The API key for content connector callback endpoint window opens:

-
Type or paste the address of the memoQ TMS in the Server base address box.
-
Paste the API key in the API key box. Remember, it must be the same as the API key configured in that memoQ TMS.
-
Click OK. The memoQ TMS appears on the list.
If the API key or the server address changes: On the list, select the memoQ TMS. Click Edit.
When you are ready, click OK to close the memoQ content connector configuration window.
Then, in the memoQ content connector server manager window, click the Start button to start the content connector service again.
Now you can start creating content connections: Use the content connector client.
Over time, you might need to do maintenance on content connector. Use the memoQ content connector server manager program's maintenance tools for that.