|
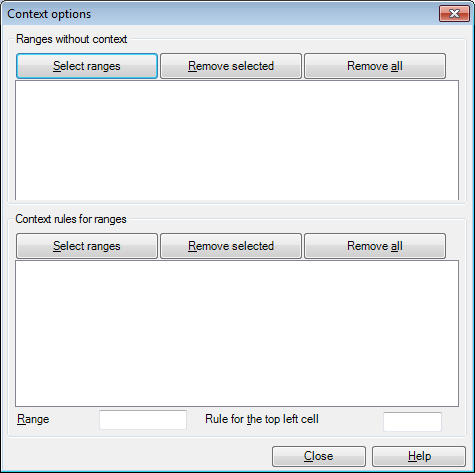
The Context options dialog lets you specify rules under which specific ranges of a Microsoft® Excel® document, marked using the Mark selected ranges dialog, are imported as contextsinto memoQ.
How to beginYou can invoke the Context options dialog when importing a Microsoft® Excel® file, from the Document import settings dialog by clicking Import context IDs, then Context options. UseThe dialog has two sections, Ranges without context and Context rules for ranges: •The Ranges without context section allows you to specify ranges in the Microsoft® Excel® file, which are not to be commented. •The Context rules for ranges section lets you specify ranges in the Microsoft® Excel® file for which comments will be imported. These comments are imported according to rules you specify for each of the ranges using the Rule for the top-left cell input box. Ranges without context section: •Select ranges: Click this button to start Microsoft® Excel® and to open the Mark selected ranges dialog to mark cells, rows or columns without context in Microsoft® Excel® directly. Any ranges you select using the Mark selected ranges dialog will be recorded as Microsoft® Excel® codes in the Ranges without context list. These codes have the following structure: •Remove: Click this button to remove a selected range from the list. •Remove all: Click this button to remove all ranges from the list. Context rules for ranges section: •Select ranges: Click this button to start Microsoft® Excel® and to open the Mark selected ranges dialog to mark cells, rows or columns with context in Microsoft® Excel® directly. Any ranges you select using the Mark selected ranges dialog will be recorded as Microsoft® Excel® codes in the Context rules for ranges list. These codes have the following structure: See the screenshot above. •Remove: Click this button to remove a selected range from the pane. •Remove all: Click this button to remove all ranges from the pane. •Range: This field indicates the range selected in the Context rules for ranges pane. •Rule for the top-left cell: Use this field to specify the required context rule, relative to the top-left cell of the range. This field is shaded in red if the code you enter is not valid. Note: For example, if the source text is in the B3:B27 range and the corresponding contexts are in the C3:C27 range, the range selected in the Context rules for ranges pane should be B3:B27, where the top-left cell is B3, which means that the rule for cell B3 should be C3 or $C3. The rules you specify are shown in the Context rules for ranges list in brackets, next to the ranges they apply to. If a certain range of your Microsoft® Excel® file is imported as context and you do not want to have the range imported for translation, which is often the case, mark this section as non-translatable using the means in the Document import settings dialog (Non-translatable data ranges section). NavigationAfter you have made all necessary changes in the Context options dialog, click Close to close dialog and return to the Document import settings dialog. |