|
Single sign-on allows users to gain access to memoQ server by simply logging on to Windows. If these settings are turned on, the users do not need to log on to memoQ server separately when checking out online projects or accessing published resources. Using these settings, you can connect memoQ server to the user database of your Windows system. Once the connection is set up, new users in specific Windows groups are automatically granted access to memoQ server. There is no need to add the same users to the user database of memoQ through the User management category of Server Administrator. The Windows user database can be the local security database of Windows, but if the computer running memoQ server is member of an Active Directory domain, memoQ server can also use user and group accounts from Active Directory. To be able to use SSO with Active Directory, the user who runs the memoQ server service must be in the domain and must have the permissions to query: •the domain name, •the list of domain controllers, •the list of groups and users of the domain. If you do not have the permissions to query the above, memoQ server will not be able to synchronize data.
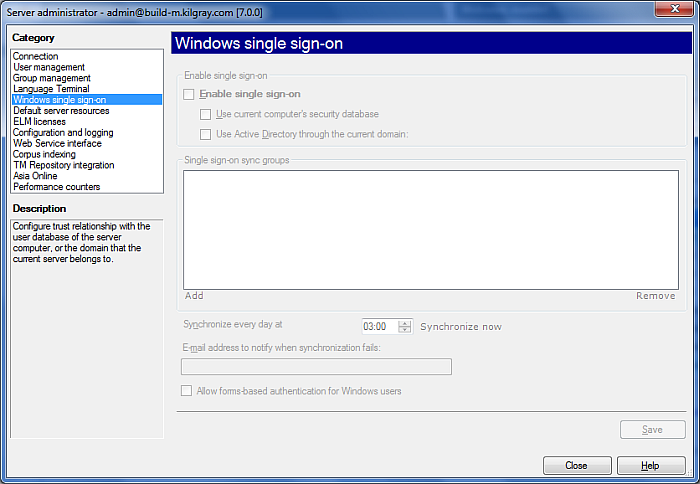
How to beginOn the Project ribbon tab, choose Server Administrator. In the Connection pane, connect to the server you want to manage. Then, in the Category list, click Windows single sign-on. UseTo start connecting your server to a Windows user database, check the Enable single sign-on check box. This enables all other settings in the Windows single sign-on pane. •Use security database on current computer check box: Check this check box to use the local security database (the SAM) for single sign-on to memoQ server. Important: memoQ server will use the security database of the computer where the memoQ server service is running. If you are managing memoQ server from a remote computer, 'current computer' and 'local database' mean the computer where memoQ server is running, not the computer you use to manage the server. •Use Active Directory through current domain check box: If the memoQ server computer is member of an Active Directory domain, you can check this check box to use the user accounts from the Active Directory domain. Note: If you connect memoQ server to an Active Directory domain, you can also grant access to user accounts in other domains that are in a trust relationship with the current domain. If the current domain is part of an Active Directory forest, you can grant access to user accounts defined in any other domain within the forest. In the Single sign-on sync groups list, you need to configure the Windows or Active Directory groups that you wish to synchronize with memoQ server. This means that memoQ will grant access to user accounts that are members of the groups listed under Single sign-on groups. •Click Add to add a group to the list. This displays the Add single sign-on sync group dialog, where you can choose one or more groups from the available Windows servers and domains. •Select a group and click Remove to remove the group from the list. Note: After you add a group to the list, memoQ server does not synchronize the user accounts immediately. Normally, user account synchronization happens once a day, at the time set in the Synchronize every day at box. If you wish to synchronize the user accounts immediately, click Save, and then click the Force resync now link. Enter an e-mail address in the E-mail address to notify when synchronization fails field. Whenever a synchronization of users fails, this person gets an e-mail. NavigationClick Close to close the Server administrator dialog. Note: Before saving any changes, memoQ will display a message asking for confirmation. Click OK to confirm the changes you made.
See also: •Add single sign-on sync group (dialog) •For more information on Active Directory, click here to view an article as a starting point.
|