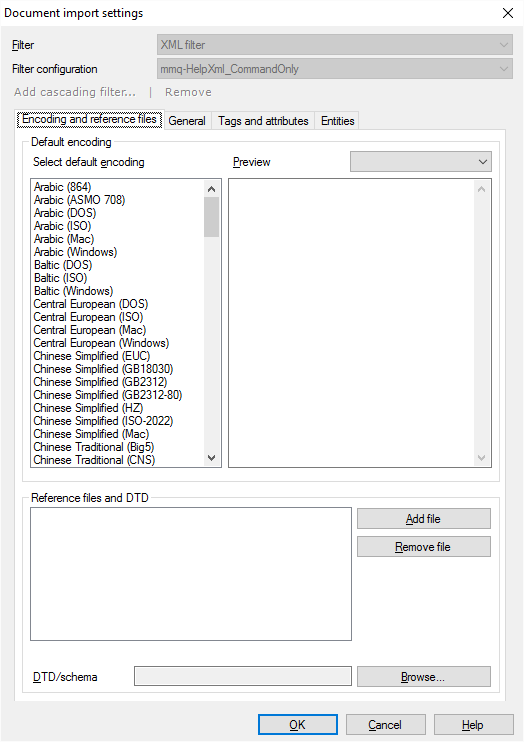
Edit filter configurations
A filter configuration tells memoQ how to read - import - a document that needs to be translated. When memoQ imports a document, it gets the text out of it, and stores the formatting (and everything else that doesn't need to be translated) in a safe place. The part that is not the text is called a skeleton.
When the translation is done, memoQ puts the translated text back in the original skeleton. This is how the translated document is produced.
A filter configuration tells memoQ what is the text that needs to be translated, what is a comment and the context of each part of the text. Occasionally, the filter configuration also tells memoQ how to put the translated text back into the skeleton.
Getting the filter configuration right is essential. It determines how much text you will have to work on; how many tags you need to deal with. Basically, it can mean a lot of money.
Creating a good filter configuration can be a lot of work. In many cases, you need to use regular expressions. When this happens, you need to save the filter configuration, so that you can use it again to import documents.
To edit a filter configuration, you need the Document import settings window. To fine-tune the filter configuration, use the Import with options command to add documents to your project.
Alternatively, you can use this window to edit a filter configuration, and save it.
How to get here
Open the Resource Console. Choose Filter configurations. In the list, click the filter configuration you want to edit. Under the list, click Edit.

What can you do?
Choose settings to import a specific type of file. A filter configuration specifies the type of document it's used for. The settings depend on the document type.
You get the same settings as in Document import settings.
For details, see the Document import settings window for each document type:
- Adobe InDesign documents (INX)
- Adobe InDesign Markup Language documents (IDML)
- Adobe FrameMaker documents (MIF) (Click here for the settings of the previous MIF version.)
- Adobe Photoshop (PSD)
- Bilingual DOC/RTF files
- HTML documents (Hypertext Markup Language)
- Java properties files (.properties)
- JavaScript Object Notation (JSON)
- Microsoft Excel workbooks and templates (XLS and XLT)
- Microsoft Excel 2007/2010/2013 (XLSX) workbooks
- Microsoft Powerpoint presentations (PPT and PPS)
- Microsoft Powerpoint 2007 presentations (PPTX)
- Microsoft Word documents (DOC and RTF)
- Microsoft Office Word 2007 documents (DOCX)
- Multilingual tables (spreadsheets, Excel workbooks) and delimited text files (CSV)
- OpenDocument format filter (OpenOffice Write) documents (ODT)
- PDF files (Portable Document Format)
- PHP Hypertext Preprocessor (PHP)
- Plain text files (TXT)
- PO Gettext files
- Regex tagger (no specific file extension; always use this after another filter), see also Regular expressions
- Regex text filter (no specific file extension; for generic regex-based processing of structured plain-text files)
- .NET Resource files (XML)
- SDL Trados TagEditor (TTX)
- SDL Trados Studio XLIFF (SDLXLIFF)
- Translation Memory Exchange (TMX) as document
- XLIFF files (XML Localization Interchange File Format)
- XML files (eXtensible Markup Language)
- YAML Ain't a Markup Language (YAML)
- AuthorIT projects (*.xml): no extra settings
- DITA documents (*.dita): no extra settings
- Excel 2003 XML spreadsheets (*.xml): no extra settings
- FreeMind mindmaps (*.mm): no extra settings
- Microsoft Visio charts (*.vdx): no extra settings
- Microsoft Help Workshop files (*.hhc, *.hhk): no extra settings
- Scalable Vector Graphics drawings (*.svg): no extra settings
- Typo3 pages (*.xml): no extra settings
- QuarkXpress (*.tag, *.qsc): no extra settings
Note: QuarkXpress is only supported when you use a QuarkXpress Plugin for QuarkXpress to extract the translatable content. memoQ supports the QSC format from Quark Story Collector (an extension for older Quark versions that came with Trados), and the TAG format from CopyFlow Gold by Napsys (http://www.napsys.com/CFGforQuark.html). Codesco has an ex-Translation filter, that will export and reimport directly in XLIFF for QuarkXpress version 7x, 8x and 9x (http://www.codesco.com/en/ex-translationfilter.html).
For Adobe Illustrator files: Check the Knowlege Base article here.
When you finish
To save the changes, and return to Resource Console: Click OK.
To use the filter configuration to import documents: Start importing a document. In the Document import settings window - in the Filter drop-down box -, choose the same document type. Then, in the Filter configuration drop-down box, choose this filter configuration.
To return to Resource Console: Click Cancel.