Translating with memoQ editor
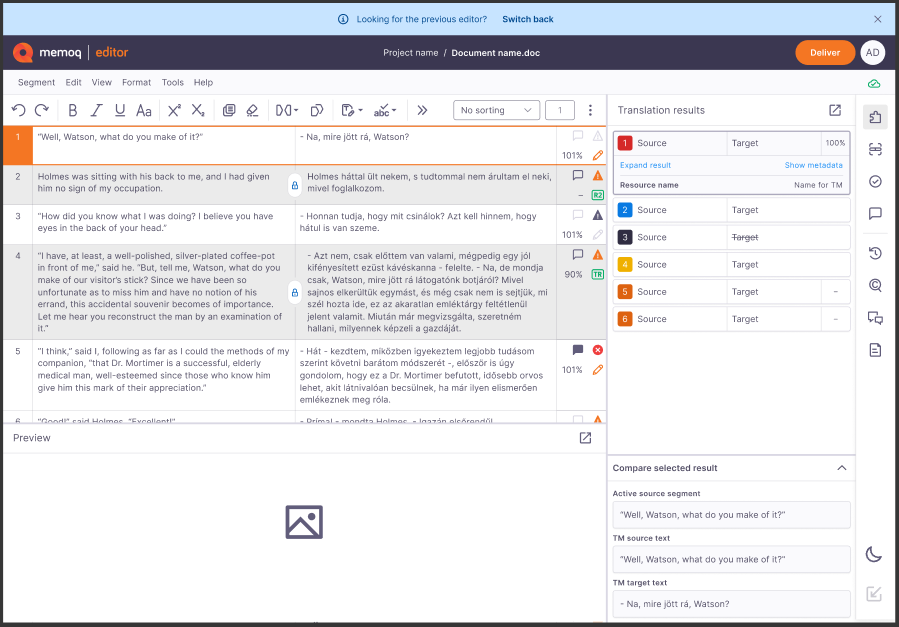
memoQ editor shows your translation divided into segments. Usually, each segment contains one sentence.
All the rows are presented in a two-column grid: the source text in the left column and the translation in the right column.
When you use structured content like tables, XML files, and databases, a single segment is usually a cell or a data record.
Start translating
-
Click a target segment (right side).
You can decide where the active segment appears to suit your workflow (in both translation and review).
To manage this setting, go to View in the top menu and select Show active row.
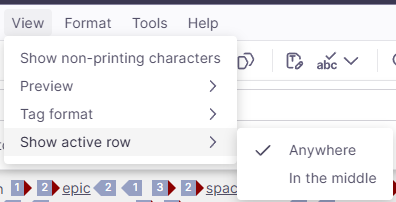
You can display the active row:
-
 Type and format your translation

-
To format text, use the Bold, Italic, Underline, Toggle case, Superscript, or Subscript options. You can also Undo or Redo your changes.
You can find those formatting tools just above the translation grid or under the Format tab.
-
If you’re looking for options to edit and manage text, go to the Edit tab where you can find the Cut, Copy, Paste, and Add comment options.
-
Click Clear translations of selected segments
 to reset the content and start fresh.
This option clears target segment text, target comments, and inserted match info.
When you use this option the segment status is set to Not started and QA issues refresh automatically.
-
Click Copy source to target
 to copy source text to its target segment.
For this option only editable rows are overwritten. Target comments are also kept.
-
To Show non-printing characters, click the View tab and select this option from the dropdown menu.
Non-printing characters are symbols that don’t appear in the final text but affect its layout and formatting. For example, a non-breaking space keeps a number and a unit together so they don’t split at the end of a line. By default, non-printing characters are hidden. When you turn them on, memoQ stores your preference in local storage and applies it the next time you open the grid.
-
Under Tag format

 , you can switch between short, medium, and long tags. By default they are displayed in a short format. You can find these options under the View tab as well.
 -
Click Copy next tag sequence
 to insert the next tag, tag pair, or tag combination that isn’t yet on the target side. You can also find tag-related options under the View tab as well.
You can also select part of the text, then press F9. If there are tag sequences available, memoQ wraps the selected text with the next tag pair.
-
Click Track changes
 to open the panel below the toolbar and view changes made in your review.
The PM has to activate this option when they’re configuring all the settings for the project.
Here you can:
-
Use the Track my changes toggle: Turn tracking on or off, depending on your project settings.
-
Choose what changes to see: Show all changes, Show my changes, Show final.
When you choose Show my changes, the accept and reject buttons are turned off because there might be changes from other users that could overlap.
-
Use the Find previous and Find next buttons to jump between changes.
-
When a change is highlighted, the Accept change and Reject change buttons become active.
Clicking Accept change applies that change and shows the final text. Clicking Reject change removes that change and shows the original text.
You can also use additional options available from the dropdown next to the Reject change button - Accept all changes and Reject all changes.
-
-
Click Check spelling and get suggestions
 to ask memoQ editor to underline words or phrases that may need correction and view suggested improvements.
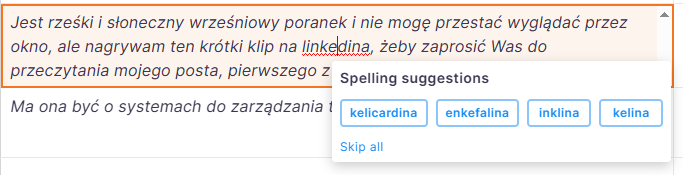
Right-click the red underline and choose an option from the menu. If you want to keep the word as it is, simply ignore the red underline or click Skip all to ignore all suggestions for the underlined word.
If you want to use and accept a specific suggestion for all the occurrences of the word in the future, click the selected example from the list.
Check spelling and get suggestions is turned on by default. You can find it under the Tools tab as well.
If you can't see red underlines, either all words are spelled correctly, or the spell checker isn’t configured for your target language.
-
If your target language is French or English, you can send your translation to Antidote's corrector to check spelling, grammar, style, and wording. You can then apply the suggested corrections directly in memoQ editor.
To use it, click Tools in the top menu, choose Integrations, and then select Antidote's corrector.

-
Click Filter
 to filter for specific text or wording. You can find this option under the Edit tab as well.
You can filter by source or target text - insert the word or text you want to find in one of the filtering fields and click Apply filter. All the results are highlighted in orange.
To quickly filter selected text in the translation grid, go to the Edit tab and click Filter, or use the Ctrl+Shift+F shortcut. The Filter panel opens with a filter based on the text you selected.
If you haven’t selected any text and the Filter panel is closed, clicking Filter opens the panel and places your cursor in the filter field. The source or target search field is automatically selected based on the active segment.
You can also decide how you want to filter for text:
-
Any match: any part of the text can contain the search term. Example: Filtering for "table" returns segments containing "tables", but not "tabloid".
-
Words match: this option means that your search term must match whole words in the text. Example: Filtering for "table" returns segments containing "table", but not "tables".
-
Entire segment: this means memoQ only returns segments that fully match your search term. Example: Filtering for "table" returns only segments whose full text is "table".
-
If needed, turn on the Match exact word order option to find words in the exact sequence you typed them.
When this is off, memoQ finds the same words in any order within the segment. This option isn't available when you select the Entire segment option from the dropdown.
-
Case-sensitive: uppercase and lowercase letters need to be exactly as in the search term. Example: Filtering for "table" returns segments containing "table", but not "Table".
To confirm, click Apply filter.
To clear the text field and filter for another phrase, click the Clear filters button. memoQ reloads the full document and automatically brings the active row back into view, so you can continue working exactly where you left off.
-
-
If you need additional filtering options, click Advanced filters next to the Apply filter button.
-
Click the Find and replace
 icon to search for specific text in your document and optionally replace it.
You can also press Ctrl + F to place the cursor in the Find field.
If text is already selected in the grid, it appears in the Find what field automatically. Press Enter to search and highlight all matches.
Here you can:
-
Use the dropdown below the Find what field to decide if you want to search in the source or target text, source or target tags, comments, or context IDs.
You can then decide if you want your search to be case-sensitive or if you want words to match your search term exactly. All the results are highlighted in orange.
-
Use the Match type dropdown to define how memoQ should look for your text:
-
Any match: Find segments containing any part of your search text. This option is set as default.
-
Words match: Find segments containing all the words you entered.
-
Entire segment or field: Find segments where the whole segment or field matches your text exactly.
-
-
Jump between the results by clicking the Find next and Find previous buttons.
-
To replace text, type the new text into the Replace with field and click the Replace button.
To replace all matches at once, click the Replace all button. It becomes available when:
-
You filled in the Find what field.
-
You selected at least the Target text option from the Select where dropdown.
Replace all won't replace matches if:
-
The segment isn't editable (for example, the row is locked or belongs to another user’s slice).
-
The match is found in source text, tags, comments, context IDs.
To undo a replacement, press Ctrl + Z.
-
-
-
-
Easily Jump to next row using Ctrl + G shortcut. You can find this option under the Segment tab as well.
-
Replace text in selected rows
Select one or more rows to replace all occurrences of a word or phrase only within those rows. It's a quick way to update multiple target segments at once without changing the rest of the document.
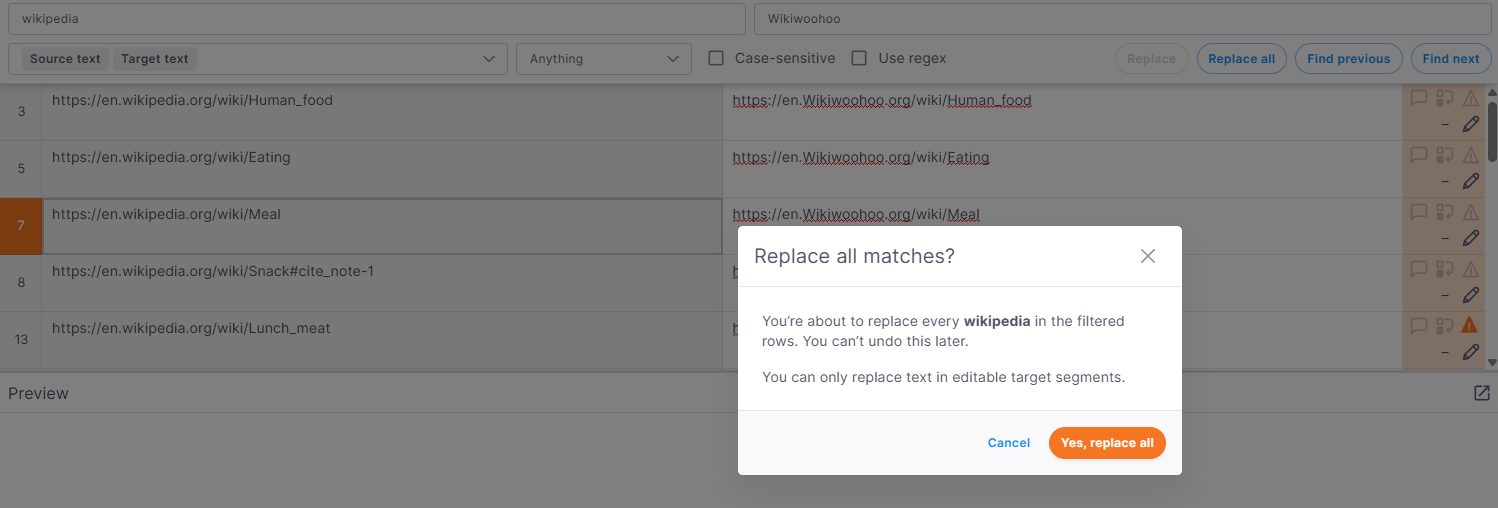
Before memoQ editor replaces the text, you'll see a confirmation message showing the text you're about to replace. Once you confirm, the replacement applies to all editable target segments in the selected rows. When the process is complete, memoQ editor tells you how many matches were replaced. If no matches are found, you'll see a message letting you know.
-
Use the dropdown at the top of the translation grid to sort or reorder the content:

Next to the dropdown you can see the number of the segment you’re currently into.
The default selection is No sorting, but you can choose from:
-
Alphabetical by source (A-Z)
-
Alphabetical by source (Z-A)
-
Alphabetical by target (A-Z)
-
Alphabetical by target (Z-A)
-
Source text length (shorter first)
-
Source text length (longer first)
-
Target text length (shorter first)
-
Target text length (longer first)
-
Match rate (higher first)
-
Frequency (lower first)
-
Frequency (higher first)
-
Last changed (older first)
-
Last changed (newer first)
-
Row status
-
-
-
Use Concordance to search across your project’s translation memories and LiveDocs corpora, and get relevant matches for words, expressions, or similar translations. This way you can stay consistent.
-
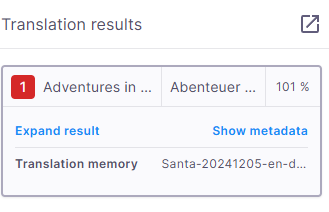
Select a suggestion from Translation results
To check the suggestions, click the Translation results
 icon on the right-side panel.
Translation results are all the results from local and online translation resources attached to the project, including translation memories, LiveDocs, term bases, fragment searching, auto-translation rules, etc. Whenever you work on a document, the translation results list is always active.
When looking up suggestions in TMs, TBs, or LiveDocs corpora, memoQ editor respects sublanguage settings. For example: en-US and en-GB can be treated as separate languages. This affects suggestions in the Translation results pane, Pre-translate, and more. The setting can be changed by a project manager in general settings.
Understand hits in the Translation results list
In the Translation results list, memoQ editor can display:
-
Term base - marked with a blue number and highlighted in light blue .
-
Forbidden terms - marked with a black number and crossed out in the list. You can't use or insert them like regular terms.
-
Non-translatables - marked with a gray number and highlighted in light gray in the translation editor.
-
LiveDocs - marked with dark red.
-
Concordance - marked with yellow.
Depending on the type of result you select, the Translation results list can look different.
Display formatting and tags
In addition to hit types, memoQ shows the true formatting and tags in hits, which helps you better understand match rates:
-
Hits display the same formatting as stored in the TM or LiveDocs.
-
Tags appear in the empty format under Translation results.
-
Both short and expanded result views use the same display for formatting and tags.
This helps you see how formatting and tags affect match rates, even when compare boxes aren’t available in the Focus on row panel.
View details and insert terms
If you need more details about the selected suggestion, click Expand result. To check the important metadata, click Show metadata (this works only for TM hits).
To insert a term into the segment, you can:
-
Press Ctrl and the number of the term you want to use (from 1 to 9), for example, Ctrl+8. You don’t have to select a specific word or phrase.
-
Double-click the term's row.
Add a new term pair quickly
You can quickly add a new term pair to your working term base with the Add terms now option. This adds the term immediately, without opening any additional dialog. You can update the term later if needed.
To do this:
-
Select text in both the source and target segments of the same row.
-
On the menu, click Tools and select Add terms now, or press Ctrl + Q.
This option works only when you select text in both source and target, the document’s languages match the term base languages, and a working term base is assigned.
What happens after you add terms?
memoQ:
-
Creates a new entry in the term base for new terms, using the source and target text you selected.
-
Fills in the project metadata and applies the term base’s defaults for new terms.
-
Reloads the term base hits for that row (so you can immediately see the new entry), if the Translation results or Focus on row panels are visible.
-
Highlights terms in light blue in the translation grid.
-
The Compare selected result option is visible by default, but you can minimize it if needed. To do so, click the arrow
 next to the box name.
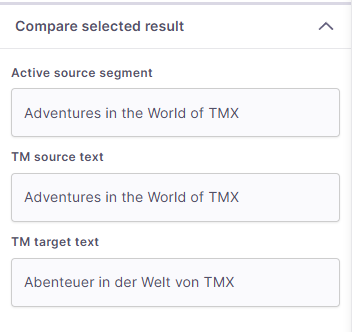
This section may look different depending on the translation result you choose to check.
-
Look up terms
Need to check whether a term has already been translated? Use Look up term to search your project term bases without leaving the editor. You can search for a word or phrase manually, look up selected text, and insert the right term directly into your translation.
You can open the Look up term panel in several ways:
-
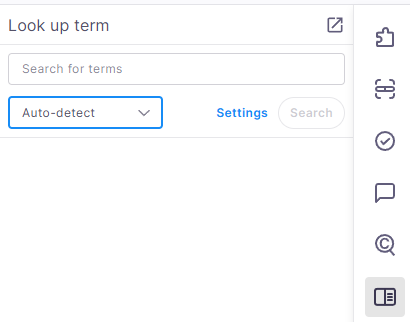
Click the Look up term
 icon on the side panel.
 -
Under Tools in the top menu select Look up term.
-
Press Ctrl+ L.
If you've selected text in the translation grid, memoQ editor searches for it automatically and shows the results. If no text is selected, you can type a search term in the search field and press Enter or click Search.
Here you can:
-
Choose where to search - use the dropdown below the search field to choose where memoQ editor looks for the term.
-
Auto-detect – memoQ editor automatically searches the source or target language based on the selected text or the active segment. This option is set as default.
Select text before opening Look up term to search it automatically and make sure to use Auto-detect if you regularly switch between source and target searches.
-
Search in source – always searches the source language, even if there is text selected on the target side.
-
Search in target – always searches the target language, even if there is text selected on the source side.
-
You can search using letters, numbers, special characters, and wildcards such as *.
-
Customize your search - click Settings to control how memoQ editor searches your term bases. The Look up term settings window opens:
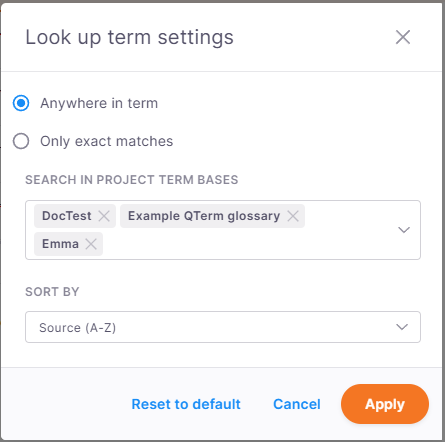
Here you can:
-
Search anywhere in a term or only for exact matches.
-
Choose which project term bases to include.
-
Change how results are sorted - Source (A-Z), Source (Z-A), Target (A-Z), Target (Z-A), Term base name (A-Z), Term base name (Z-A).
To confirm and start looking up a term, click Apply.
memoQ editor remembers your search preferences, so you don't need to set them every time you open the panel.
-
-
Review the results
Search results appear below the search area.
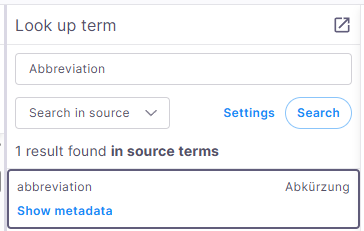
For each result, you can see the source and target terms, as well as the term base where the term was found. To get additional entry information click Show metadata.
-
Insert a term into your translation
Select a result, then click Insert result to add the translated term to the active target segment. If your cursor is inside the segment, memoQ editor inserts the term at the cursor position. Otherwise, it adds the term to the end of the segment.
-
-
Focus on a specific row
To get all the relevant information for the row being translated, click the Focus on row
 icon on the right-side panel.
Here you can check:
-
Translation results - all the suggestions for this specific row.
These come from translation memories, term bases, and non-translatable lists in the project.
Understand hits in the Translation results list
In the Translation results list, memoQ editor can display:
-
Translation memory hits - marked with a red number.
-
Term base - marked with a blue number and highlighted in light blue .
-
Forbidden terms - marked with a black number and crossed out in the list. You can't use or insert them like regular terms.
-
Non-translatables - marked with a gray number and highlighted in light gray in the translation editor.
-
LiveDocs - marked with dark red.
-
Machine translation - marked with orange.
-
Concordance - marked with yellow.
Depending on the type of result you select, the Translation results list can look different.
Display formatting and tags
In addition to hit types, memoQ shows the true formatting and tags in hits, which helps you better understand match rates:
-
Hits display the same formatting as stored in the TM or LiveDocs.
-
Tags appear in the empty format under Translation results.
-
Both short and expanded result views use the same display for formatting and tags.
This helps you see how formatting and tags affect match rates, even when compare boxes aren’t available in the Focus on row panel.
View details and insert terms
If you need more details about the selected suggestion, click Expand result. To check the important metadata, click Show metadata (this works only for TM hits).
To insert a term into the segment, you can:
-
Press Ctrl and the number of the term you want to use (from 1 to 9), for example, Ctrl+8. You don’t have to select a specific word or phrase.
-
Double-click the term's row.
-
-
Select text in both the source and target segments of the same row.
-
On the menu, click Tools and select Add terms now, or press Ctrl + Q.
This option works only when you select text in both source and target, the document’s languages match the term base languages, and a working term base is assigned.
-
Creates a new entry in the term base for new terms, using the source and target text you selected.
-
Fills in the project metadata and applies the term base’s defaults for new terms.
-
Reloads the term base hits for that row (so you can immediately see the new entry), if the Translation results or Focus on row panels are visible.
-
Highlights terms in light blue in the translation grid.
-
Comments - the list shows all the comments added to this row. In the translation editor, the commented text is highlighted in green.
There are three types of comment icons you can see:
 - no comments added yet
 - comments added by other users
 - your comments
Here, you can:
-
Add a comment about a whole row - click its Add/view comment
icon. -
Add comments to rows that already have comments. The comments list shows how many comments you and others added to each row.
You can also click the Add/view comment
icon.The memoQ editor opens the comments for the row you're reviewing, and the number next to the icon shows the total count of comments for that row.
-
Edit or delete a comment. To do that, click the More options
 icon in the top-right corner of the comment. You can only edit or delete your own comments.
To check all the comments, you can also click the Comments
icon on the right-side panel.
-
Add a new term pair quickly
You can quickly add a new term pair to your working term base with the Add terms now option. This adds the term immediately, without opening any additional dialog. You can update the term later if needed.
To do this:
What happens after you add terms?
memoQ:
-
-
Check reference files
To check reference files uploaded by your project manager:
-
In the sidebar click the Reference files
 icon.
icon. -
You'll see a list of downloadable files. You can sort them by file name, file type, or language.
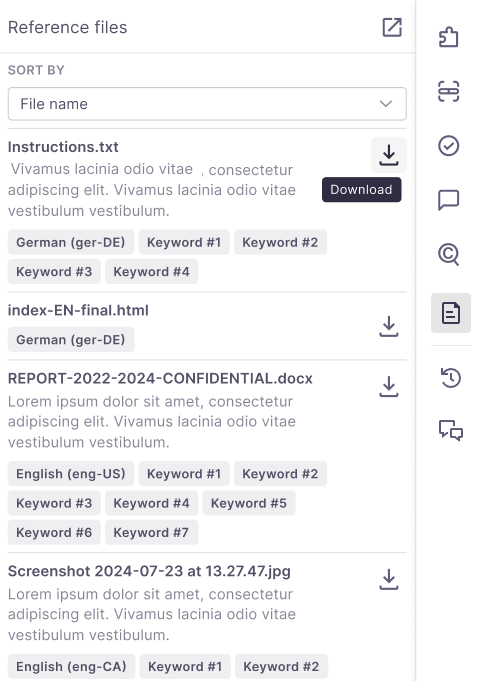
memoQ editor displays them in alphabetical order and includes:
-
-
Check what you can do with segments
Confirm or reject segments
To confirm a segment, press Ctrl + Enter. To reject a segment, press Shift + Enter.
Those options are also available under the Segment tab, or simply by using the
 and
and  buttons just above the target column.
Depending on the action you take, memoQ editor displays an icon on the grid:
-
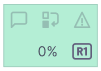
For confirmed rows - depending on who confirmed the row,
 for translator,
  for Reviewer 1, and
  for Reviewer 2.
When you confirm your translation, memoQ editor saves the translation in the document and in the working translation memory of the project.
-
For rejected rows –
 .
.
Select multiple segments at once
-
To select multiple segments: Click the first row to start, then hold Shift and click the last row to select everything in between or use the Up or Down arrow keys.
-
Ctrl+Shift+A selects all visible rows (filters applied).
-
Selecting is cleared when you click outside of the selection or start doing a different action in the editor.
-
Available actions for multiple rows include copy source, confirm, reject, clear, join, lock, and unlock.
Confirm without updating the translation memory
Use Confirm without update when you want to confirm one or more segments without adding new entries to the working translation memory (TM).
To do that:
-
Click Segment in the top menu.
-
Select Confirm without update from the dropdown list.
OR
Press Ctrl+Shift+Enter.
Join and split segments
Before you start, open the My task details window and check if joining and splitting is allowed under the Task rules section.
In some projects, you may need to correct segmentation, for example, when a sentence was split incorrectly, or two sentences should be combined. If the project manager allows it, you can join or split segments directly in memoQ editor.
To use those options, in the top menu click Segment and select Join (Ctrl + J) or Split (Ctrl + S) from the dropdown. You can also right-click a segment (or multiple selected segments) and choose one of these options from the context menu.
How Split works:
-
Place the cursor in the source segment at the exact point where you want to split.
-
Choose Split or press Ctrl+ S.
memoQ divides the source into two segments. The target text remains in the first segment, so you can continue editing it afterward.
Split won't work if your cursor is at the very beginning or very end of the segment.
How Join works:
-
Place the cursor in the source segment at the exact point where you want to join.
-
Choose Join or press Ctrl+ J.
memoQ merges the selected segments into one and keeps or inserts the structural tags between segments as needed.
When you try to join more than five segments at once, memoQ warns you first to help prevent accidental bulk joins.
Lock and unlock segments
If you are a project manager or an admin, you can lock rows to prevent editing by linguists.
To do that, in the top menu click the Segment tab, and then from the dropdown choose Lock/unlock segment.
You can also press Ctrl+Shift + L.
Locked rows show a lock icon and are excluded from editing. Unlocking removes the lock icon and allows editing. It's possible to lock or unlock multiple segments at once.
-
-
Review the translation
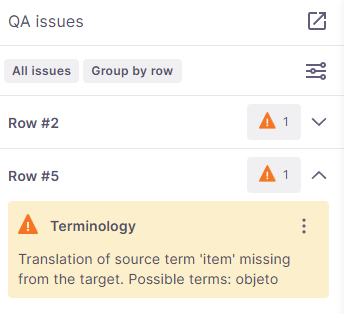
QA issues help you catch errors or inconsistencies in your translations. memoQ editor gives you flexible tools to filter, review, and manage warnings so you can focus only on what matters. Any segment with potential issues (e.g., missing punctuation, terminology mismatches) is marked with a warning
 .
.To start your review, click QA issues
 in the right sidebar.
Here you can:
-
See Active filters, which show your current view settings, at the top of the QA issues sidebar.
To make your review easier, click Change under the current settings list and decide how you want to filter and group your QA issues.
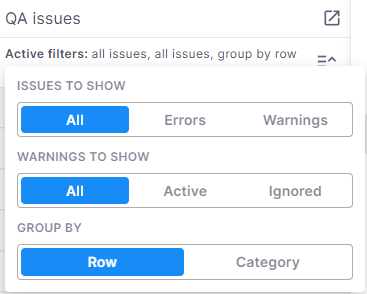
Use the toggles to adjust what memoQ should show you:
-
Issues to show - All issues, only Errors, or only Warnings.
-
Warnings to show - All, Active, or Ignored (only available if you’re showing All issues or Warnings).
-
Group them by:
-
Row - display all issues identified for a specific row in one card. This option is set as default.
-
Category - display dropdowns with identified issues like consistency, numbers, or punctuation and whitespace.
To save your new settings, click anywhere outside the panel.
-
-
-
Work with selected issues
When you select one or more issues, a new row appears under Active filters showing 3 new options: Ignore selected, Restore selected, and Remove selection.

Depending on what issues you selected, the Ignore selected, Restore selected, or both options can be active.
It's possible that during your work you'll see:
-
Active warnings marked in yellow
If you decide to group your warnings by Row, in the top-left corner of the card, memoQ editor shows you the row number, then the issue type and its description.
If you decide to group your warnings by Category, in the top-left corner of the card, memoQ editor shows you the identified issue type, then the row number, and its description.
To ignore a single warning, click the Ignore
 icon on its card.
To ignore all warnings of the same type, click Ignore this warning type
 . A dialog opens where you choose how you want to ignore them (options depend on the warning type).
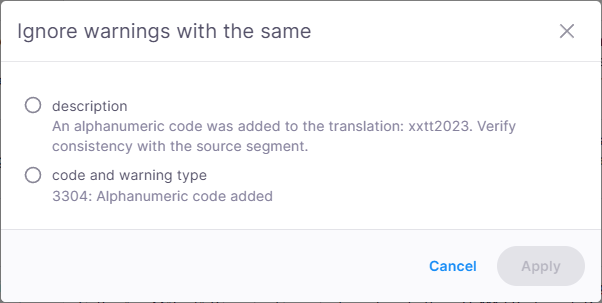
Click Apply to confirm.
-
Ignored warnings marked in gray

If you decide to group your warnings by Row, in the top-left corner of the card, memoQ editor shows you the row number, then the issue type and its description.
If you decide to group your warnings by Category, in the top-left corner of the card, memoQ editor shows you the identified issue type, then the row number, and its description.
To make your warning active again and take it into consideration, click Restore
 . The icon changes color back to yellow, and the field will be marked as an active warning.
 -
Errors marked in red

Errors can't be ignored.
If you decide to group your errors by Row, in the top-left corner of the card, memoQ editor shows you the row number, then the issue type and its description.
If you decide to group your errors by Category, in the top-left corner of the card, memoQ editor shows you the identified issue type, then the row number, and its description.
Click the card of the error or warning you want to check and memoQ editor redirects you straight to the place in the translation grid.
-
What's more
You can use the Preview pane at any time to see a real-time view of your translated document.
You can move it to the top of the page (or back to the bottom), change its height, or just hide it if you don’t need it at the moment. Don’t worry, you can bring your hidden preview back at any time.
To work with your Preview options, click the View tab and then choose Preview.
In memoQ editor, the status cells have background colors so you can see what happened to a selected row.
| Status cell color | Action | What it looks like |
|---|---|---|
| White | Not started |
|
| Orange | Edited |
|
| Light green | TR confirmed |

|
| Green | R1 confirmed |
|
|
Dark green |
R2 confirmed |

|
| Blue | Pre-translated |
|
| Yellow | Machine-translated |
|
| Red | Rejected |
|
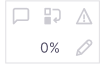
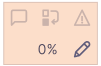
At the bottom of the window, you’ll find the status bar, your quick overview of what’s happening in your document.

It shows the following details:
-
 : Save status. Once everything is safely saved, you’ll see the cloud icon and the message All changes saved.
 -
Context ID of the segment you’re working on. If it’s too long, hover over it to see the full ID. If you want to copy the ID, use the Copy to clipboard
 icon next to it.
 -
A percent of how much of the project is done (in the current target language). Normally, this is shown as a percent of the word count.
-
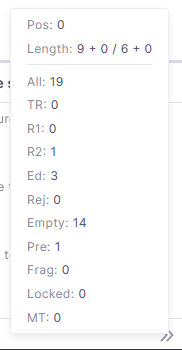
All: Number of all segments in the document.
-
TR: Number of segments confirmed by a translator.
-
R1: Number of segments confirmed by a Reviewer 1.
-
R2: Number of segments confirmed by a Reviewer 2.
-
Ed: Number of segments edited but not confirmed.
-
Rej: Number of segments rejected by a reviewer.
-
Empty: Number of segments that haven't been touched yet.
-
Pre: Number of segments that were pre-translated but not edited yet.
-
Frag: Number of segments where pre-translation inserted a fragment-assembled match.
-
Locked: Number of locked segments.
-
MT: Number of segments where pre-translation inserted a machine translation plugin's output.
-
Pos: Current position in the segment.
-
Length: Length of the source segment and of the target segment in characters. Tag length appears after a plus sign.
If your window doesn't display the full information from the status bar, you’ll see the Show more ![]() icon. Click it to open an expanded view where all items are shown clearly on separate lines.
icon. Click it to open an expanded view where all items are shown clearly on separate lines.
As a linguist, sometimes you need to edit the source text to make sure the translation memory (TM) stays accurate.
The project manager can allow or forbid translators to edit source text.
Here’s how source editing works in memoQ editor:
-
You can find Edit source under the Edit tab or just press F2.
-
This option is grayed out if you can’t edit the target segment, for example, in locked rows, rows assigned to other users, or R2 confirmed rows (which only R2 users can edit).
-
When you choose Edit source, the source segment becomes active, and you’ll see the blinking cursor ready for you to start typing, usually at the end of the segment.
-
You can edit the text and inline tags inside the source, but not structural tags (like insert or delete tags).
-
Once you start editing, the row status changes to Edited.
-
To finish editing the source, just use the Edit source command again or click anywhere outside the source segment. memoQ editor saves your changes and the target segment becomes active again.
Comments often contain questions, notes, or discussions between you and your team. Clearing them helps make sure these internal comments aren't included when the document is shared outside the project.
When you export a translated .docx document, comments can be included in the exported file. If you don’t want them to appear in the final document, use Clear comments first. This deletes the comment threads but keeps all the document text unchanged.
To do that:
-
From the top menu, choose Edit and then click Clear comments.
-
When opened, the Clear comments dialog allows you to define:
-
Scope
-
All rows (default if no rows are selected)
-
Selected rows
-
-
Comment types to clear
-
All comment types (selects all categories)
-
Information
-
Warning
-
Error
-
Other
-
-
-
After selecting the desired scope and categories, click Clear.
If you're an admin or PM, you can clear all the comments. If you're a linguist, you can clear only your own comments.
When you finish
At this point you can deliver your translation.
To do this:
-
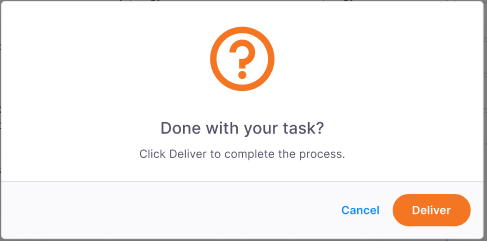
In the top-right corner of the screen, click the Deliver button.
The confirmation window opens:
Sometimes you won't be able to deliver your translation due to errors or issues that need your attention, for example:
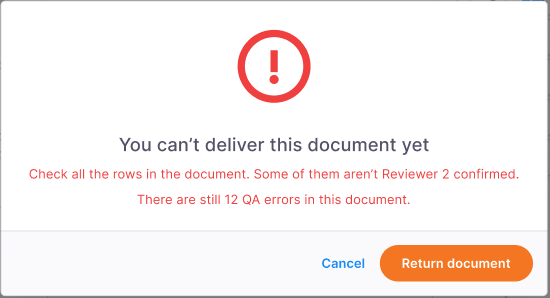
In such cases, memoQ editor displays the necessary info in the confirmation window, letting you know what to do next. Above, you can see the button says Return document as this is the recommended action.
-
If you’re sure you want to deliver your translation and there are no issues or errors, click the Deliver button.
To go back to the document, click Cancel.
-
After delivering your task, the memoQ editor displays the confirmation banner at the top of the screen.