Edit project template
You can edit project templates here. A project template helps you create memoQ projects very quickly and consistently.
A project template is a collection of settings, commands, and scripts that help to create a new project where documents and resources are processed automatically, and the project manager has very little to do.
You cannot edit default project templates. (There are two in memoQ translator pro, and three on a memoQ TMS.) Either you need to make a copy of a default template, or you need to create a new one.
You use templates to create projects: To use a project template, create a project. Open memoQ. On the Project ribbon, choose New project from template or New online project from template.
Same template for local and online projects: You can create local and online projects from the same template. A template has settings for both kinds.
Before you finish editing the template: Review all settings of the template. At the bottom of the Edit project template window, click Preview full list of template settings. The Template overview window appears.
How to get here
Open the Resource Console. Choose Project templates. Select the template you want to edit. Under the list, click Edit.
Or: Right-click the template you want to edit. From the menu, choose Edit.
For online projects: Create and edit a template on the server. Choose a server at the top of Resource console before you select a template.
What can you do?
In online projects, several people work on the same project. There are extra settings to set up how the project will behave, and who will translate and review.
You need to choose the rest of the settings, too.
- In the top right corner of the Edit project template window: Click the closed eye. The Online project settings and the People categories appear.
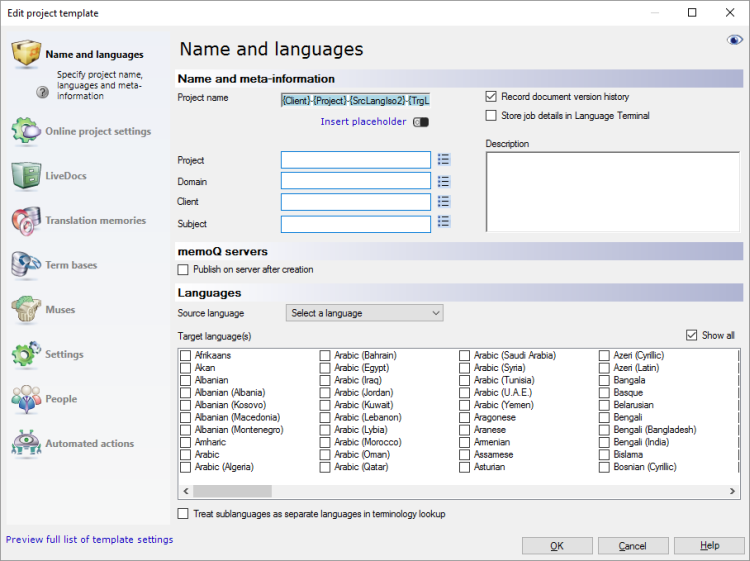
- Adjust the online project workflow, checkout options, and communication: Online project settings
- Choose who translators and reviewers will be: People
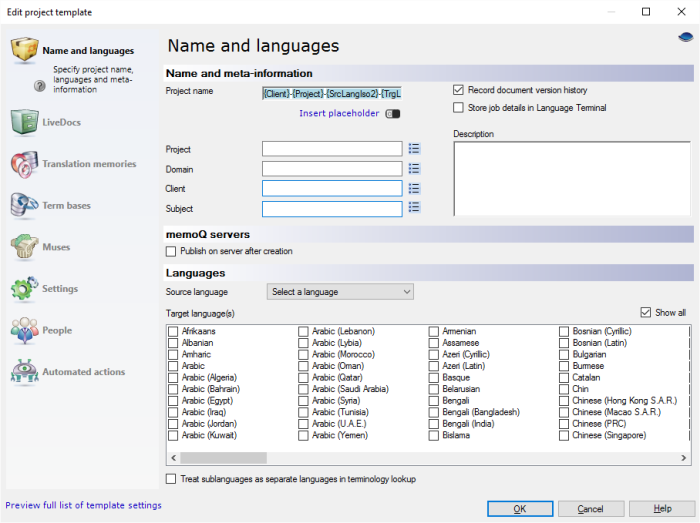
Set up the project name and languages
You can't just type a project name here. This is a template: Several new projects will use the details you set here. You need to set up rules that memoQ uses to set the names of new projects.
You can put together the project name from fields (or placeholders).
- Project: Contents of the Project box. This is an overall project name that can be used for several jobs.
- Domain: Contents of the Domain box. Use this if you need a subcategory under the subject field.
- Client: Contents of the Client box. Name of the client who orders the job.
- Subject: Contents of the Subject box. Name of the subject field.
- SrcLangIso2: Two-letter code of the source language.
- SrcLangIso3: Three-letter code of the source language.
- TrgLangIso2: Two-letter code of the target language.
- TrgLangIso3: Three-letter code of the target language.
- TrgLangListIso2: Two-letter codes of the target languages (if there are two or more).
- TrgLangListIso3: Three-letter codes of the target languages (if there are two or more).
- YYYY: The year when the project is created.
- MM: The month when the project is created.
- DD: The day when the project is created.
- HH-MM: The time of day (hours, minutes) when the project is created.
You don't have to use all of them. But make sure the name will be different for each new project.
For example, if the Project name box has {Project}-{Client}-{SrcLangIso2} in it: The name of the project will be Localization-memoQLtd-EN if
- the Project is Localization
- the Client is memoQLtd
- and the source language of the project is English (without a sublanguage).
Fill in the Project, Domain, Client, and Subject boxes. If the Project name box contains placeholders for Project, Domain, Client, or Subject, you must fill in that box. In the example above, you must fill in the Project and the Client boxes.
In these four boxes, you can choose the values from lists, too. But you must set up the list first. Click the ![]() icon next to one of the fields. The Predefined values window appears.
icon next to one of the fields. The Predefined values window appears.
After you set up a list of values, you can't edit that box: you must choose from the list. If you want to edit the box again, click the ![]() icon again, and delete all items from the list.
icon again, and delete all items from the list.
Always type a description, so that you remember the purpose and origin of this project template.
To always create an online project, even if you are creating a local project from this template: Select the Publish on server after creation checkbox. If you create a local project from the template, memoQ automatically publishes it on a server that you choose.
Can't do this in translator pro: You need the project manager edition of memoQ to do this.
Choose a source language from the Source language drop-down box.
One target language in translator pro: Choose one target language for the new project.
Several target languages in project manager: In the Target language(s) box, select the checkboxes of the target languages that you want to use.
You don't have to choose languages: If you do not choose source or target languages, memoQ tries to set them automatically when you create a new project from this template. memoQ will try to detect the source language from the documents you add to the project. It will remember target languages from before.
Choose the sensitivity of term bases: If you select the Treat sublanguages as separate languages in TB lookup checkbox, memoQ doesn't search English (US) terms if the source language is English (UK), for example.
Set up the predefined values for Client, Project, Domain, and Subject
For online projects, configure settings
Adjust various project Settings
For online projects, add People if necessary
Make tasks run automatically: Automated actions
Make memoQ run your own programs or scripts: Scripting
We even wrote a script for you: Process documents using the built-in Find and Replace tool
When you finish
Before you click OK: Review all settings of the template. At the bottom of the Edit project template window, click Preview full list of template settings. The Template overview window appears.
To save the project template: Click OK.
To return to the Resource console, and not change the project template: Click Cancel.