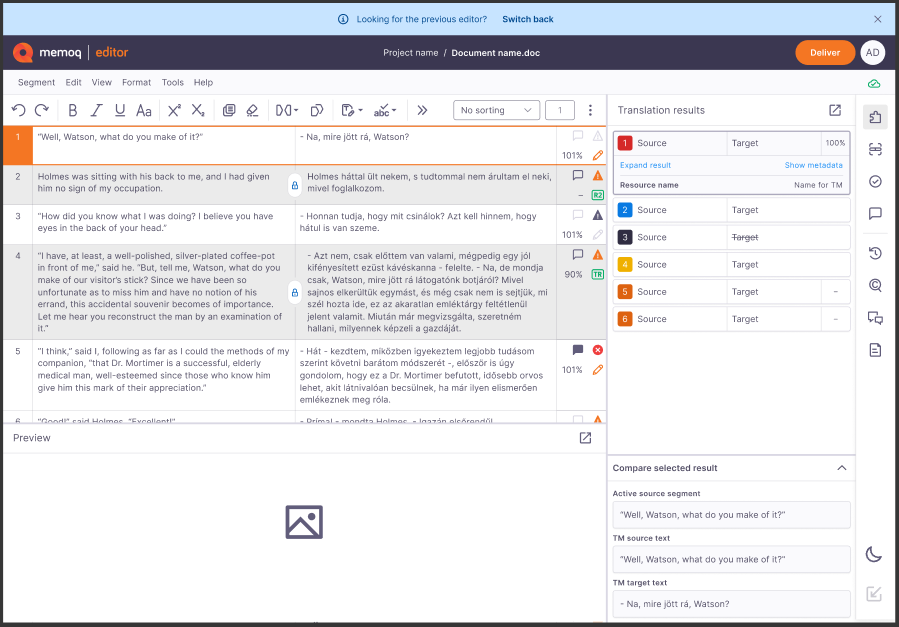
memoQ editor for translators
This is our fresh take on the classic webtrans - the tool where you can write, edit, or review your translation in a browser.
Who can use memoQ editor?
Companies: Can use it with an active memoQ TMS subscription. They handle the licensing.
In-house translators: Can use it with a web license provided by their company.
Freelance translators: Can access memoQ editor via a web license assigned by a client for specific projects. Unfortunately, they can’t buy memoQ editor for personal use.
How to get here
You receive an email from your customer's memoQ TMS. In the email, click the link, and it should open in a browser.
If you know the URL of the memoQ TMS where you need to work, open it in a browser.
Sign in with the username and password you received from your customer.
When you open a translation document for the first time after an update to memoQ 11.5 or later, you’ll see a What's new window. It highlights the latest features, so you can quickly see what’s changed and start using the improvements right away.
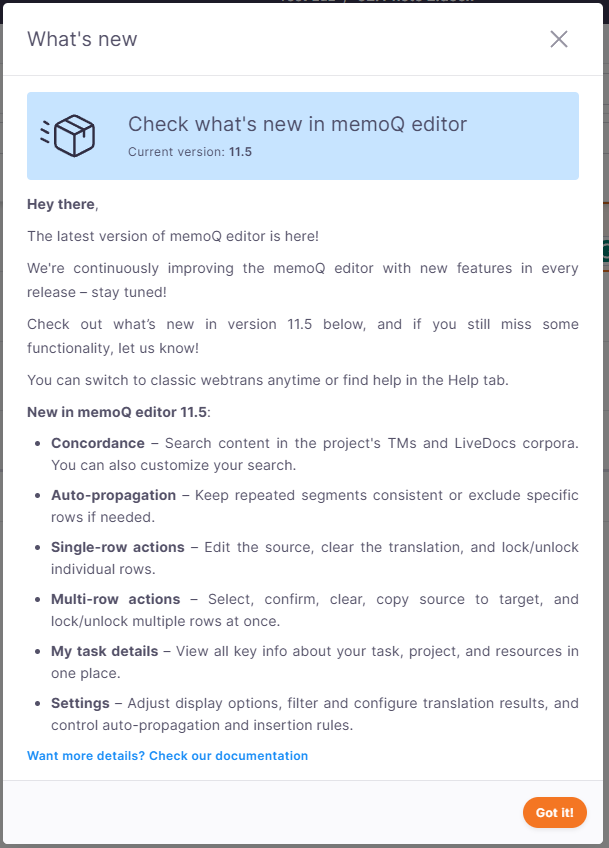
If you need more details about the latest features, click Check our documentation.
To open this window anytime, in the top menu, click Help, then choose What's new.
You can switch between the new memoQ editor and the classic webtrans interface at any time, depending on your workflow and feature requirements.
How to switch back to webtrans?
Click Switch back on the banner at the top of the page.
If the banner is no longer visible, click Help in the top menu and select Switch back to the previous editor.
What happens when you switch?
Once you switch, you'll be able to continue working in the classic webtrans.
If you want to return to the new memoQ editor later, use the Try the new editor button in the header. You can switch between the two editors at any time.
When a new version of the memoQ editor is released, you’ll see the What's new screen. You can still switch back if the new version doesn’t yet have all the features you need.
Your feedback is crucial in shaping the new memoQ editor. If you switch back, let us know what’s missing so we can improve the tool and your experience.
If you want to learn more about how project managers can use memoQ editor, you can find all the details on the memoQ editor for PMs page.
What can you do?
Translate or review your documents in the translation grid.
Use the Translation results pane to check suggestions from translation memories, LiveDocs, and machine translation. You can insert or review them as needed.
Pre-translate your content to fill in segments automatically using resources configured in your project. Try using machine translation when no TM or LiveDocs matches are found, decide how to handle unmatched segments or tag errors, and optionally apply TM-driven segmentation to improve match accuracy.
See how the document looks in the Preview pane.
Edit the source text if needed. You'll see this option displayed in the My task details window.
The project manager can allow or forbid translators to edit source text.
 Check details of your current task
When you start working on a document you've been assigned to, memoQ editor displays the My task details window to help you understand everything about your task at a glance.
This window opens automatically the first time you open a document. You can also access it any time via the Help menu (only if you're assigned to the task).
Project managers or admins who aren't assigned to the document won’t see this window or menu item.
What’s inside the My task details window?
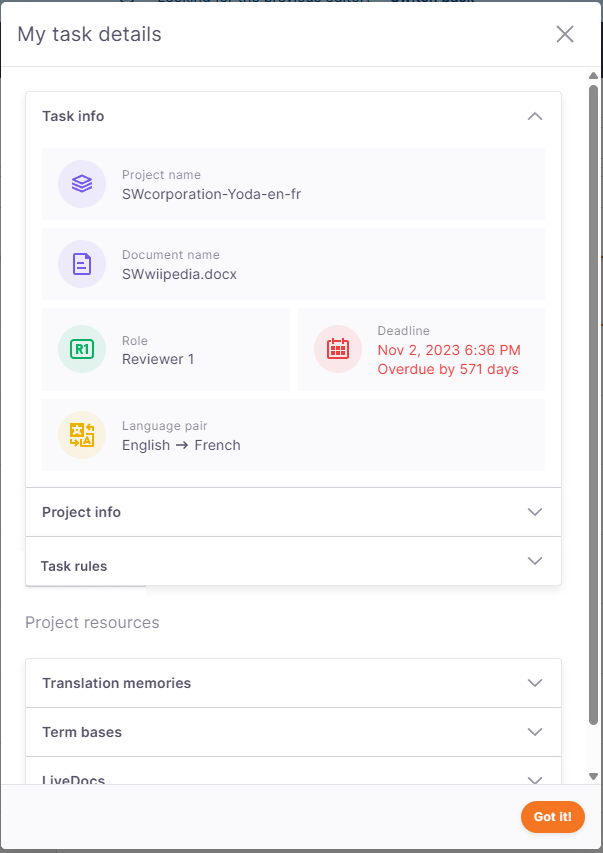
Task info: Project and document name, your role (e.g., Translator, Reviewer 1), deadline, language pair (source → target).
Project info: Project, client, subject, domain, and description.
Task rules: This section shows what you're allowed to do in this document. You can see here rules set by the PM, e.g., can translators and reviewers work at the same time? Yes/No, can you join/split segments? Yes/No.
Under Project resources you can find info about resources attached to your project.
- Tailor your workspace with editor settings
You can customize memoQ editor in the Settings window.
To do that:
In the top menu, click Tools.
From the dropdown, select Settings to open the Settings window.
The Settings window is organized into three expandable sections that allows you to:
Each accordion has a Reset to default button to restore its settings independently.
When you first open the Settings dialog, all accordions are closed to reduce clutter. You can open multiple accordions simultaneously, and your preferences will be remembered next time.
- Check your tasks and profile
You can check all the translations tasks assigned to you on the My tasks page.
To get there, click the icon with your initials in the top-right corner of the screen.
memoQ editor redirects you to the My tasks page in memoQweb.
From here, you can also go to your profile in memoQweb, check your role, or log out.
- Use shortcuts for faster work
When you finish
At this point you can: