|
The Publish project wizard turns your local project into an online project. You use this wizard after you prepare a translation job as a local project.
How to begin
•On the Project ribbon tab, select a local project, then click the Publish On Server button. When you have a local project open, you can invoke the Publish project wizard in clicking the Publish On Server button on the Project ribbon tab. No need to close the local project to publish it. •If the local project is open, go to Project home, and click the Overview icon. On the Handoff/delivery tab, click the Publish current project on server link. Note: You need to check the task assignments in your project before publishing it on a server. To do this, go to the Overview pane of Project home. Click the General tab, then the Check project now link.
Use
You can publish any local project on a server. Before you publish the project, you need to assign the translation documents to users, preferably in all three roles (Translator, Reviewer 1, and Reviewer 2). You can freely type in any user name; the Publish project wizard will match them to the users on the server.
•All translation documents and views in your local projects will be uploaded as memoQ XLIFF documents. Views will become ordinary documents: online projects do not support views. •All local resources (translation memories, term bases etc.) are uploaded to the server and published. •You cannot create new users on the server from the Publish project wizard. Before you publish your project, use the User management pane of the Server administrator to create all necessary users on the server. •The local project remains on your computer after the online copy is created. Important: To publish local projects on memoQ servers, you need the project manager edition of memoQ.
Step 1: Choose the server where you wish to publish the project
In the first page of the Publish project wizard, you can choose the server where the project will be published. You need a user account (a user name and a password) to access the server. To publish a project, you must be member of the Administrators or Project managers group on the server.
Type the address of your memoQ server in the Server URL box. memoQ remembers the servers that you used in the past, and the most recently used server address automatically appears in this box. After you type or choose the server address, click Select next to the Server URL box.
memoQ connects to the server. If you have not connected to the server before, memoQ prompts you for a user name and a password. Specify a user name and a password that is a member of the Administrators or the Project managers group on the server.
After you select the server, further options appear in the first wizard page:
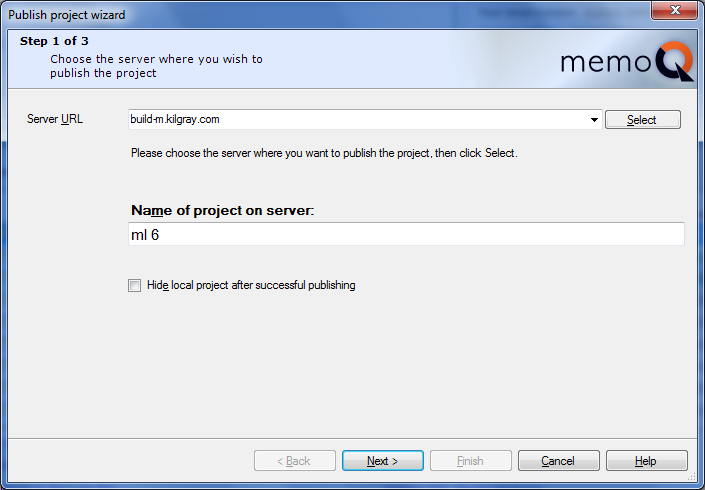
In the Name of project on server text box, choose a name for the project as it will be published on the memoQ server. By default, the name is the same as the name of your local project.
If you check the Hide local project after successful publishing check box, memoQ will hide the original local project from the project lists in the Dashboard and the Manage projects dialog, and shows the online copy only. This prevents you from accidentally mixing up the original local copy and the online version of the project. The original local project will still be available – you can still open it by choosing the Open project command, and finding the project folder.
Navigation
Click Next to proceed to the second wizard page. To publish the project using default settings, click Finish. Click Cancel to leave the wizard without publishing the project.
Note: The Next button will not be available until you click Select to log on to the server, and you choose a method to store your documents in the project.
|
|
Step 2: Match users in the local project to server users
In the second page of the Publish project wizard, you need to match the user names in your local project to the user names that exist on the memoQ server. This is necessary because in a local project, you do not choose users from a memoQ server: you can type any name next to a document. For each 'local' user name in your original project, memoQ displays a drop-down list where you can choose from users on the memoQ server.
Note: If there is a user on the memoQ server with the same name as a local user, the wizard automatically selects that user in the corresponding drop-down box.
Tip: You can also create new users on the server from this wizard page: click the Create new user link next to the Back button. The User properties dialog appears where you can enter the details of the user. When you create a new user, it will automatically be selected in the drop-down list in the highlighted row.
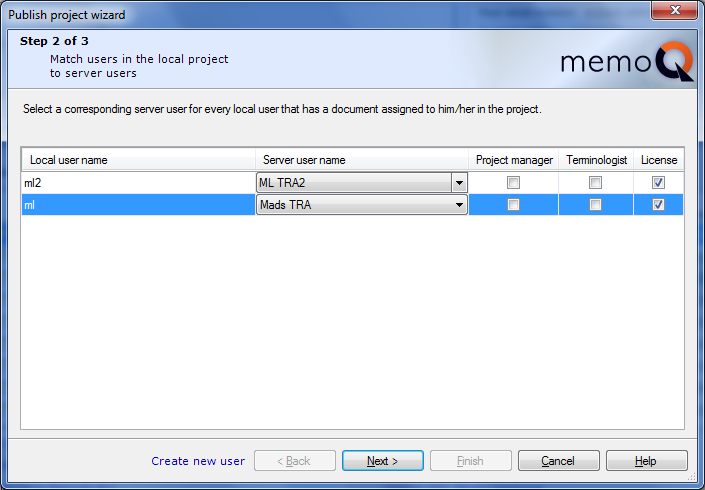
•You can set the project-wide role of the user using the check boxes next to each user name. If you click the Project manager check box for a user, memoQ will grant the user project manager privileges. If you tick the Terminologist check box, the user will have terminologist privileges. This gives these users extra permissions over the resources in the project – as long as the user is member of the project team, and the resource is included in the project. •The License check box next to each user controls whether or not the user is granted a mobile license from the server. This can be CAL or ELM, depending on the configuration of the server. When the user checks out the project, memoQ checks if the current edition permits the user to work with online projects. If the user is not permitted to connect to an online project, memoQ will obtain a mobile license from the memoQ server. The license will be valid until the deadline of the project expires. Note: When a user accesses the project through memoQWeb, memoQ server will always use a license. This license can be a regular mobile (CAL/ELM) license, or a web license, which is available for memoQWeb servers in memoQ 2015 (7.8.100) and later.
Navigation
Click Next to proceed to the third wizard page. Click Cancel to leave the wizard without publishing the project.
Note: You cannot go back to the first page using the Back button. If you need to publish the project on a different server, click Cancel to leave the wizard, and start it again.
|
Step 3: Choose which resources to publish along with the project
The third page of the Publish project wizard lists all local LiveDocs corpora, translation memories, and term bases in your project. For each resource, you can choose whether or not to publish them on the server. Resources you publish will be available in the online project; resources you choose not to publish will not be uploaded to the server, and they will not be available to those checking out the online copy of the project.
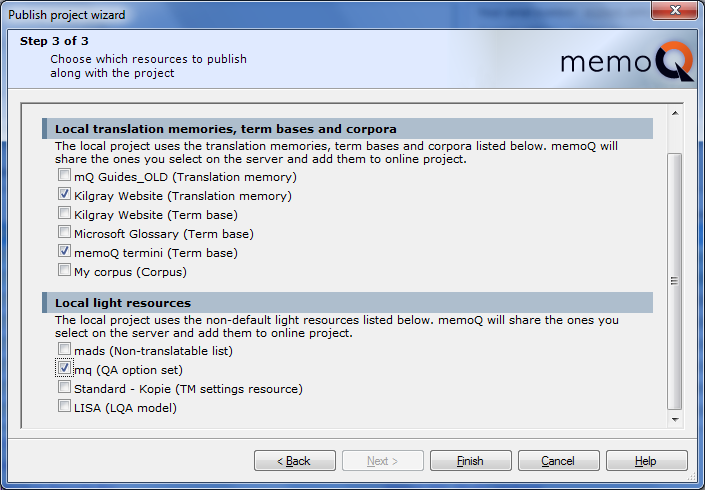
By default, none of the local resources are selected for publishing. Check the check box for each resource you want to publish.
Navigation
Click Back to return to the second wizard page. Click Next to proceed to the third wizard page. Click Cancel to leave the wizard without publishing the project.
Note: If you publish a local project that was created from a project template, then the next wizard pages are not displayed. The project is published with the settings from the project template.
|
Step 4: Project workflow options of your project
In the forth page of the Publish project wizard, you can set the project workflow options for your project.
In the Workflow options section, choose if you want to allow packages or the simultaneous translation and review. If you check the Allow package creation check box, then Resources in packages section on the last page of the Publish project wizard is displayed.
In the Quality assurance measures section, you can check the Prevent delivering documents with QA errors check box. With this check box enabled, translators cannot deliver their documents when they contain QA errors, the translator needs to resolve them first before he can deliver the files.
Choose your Confidentiality measures to disable plugins. When the translator checks out the project, a message is shown that plugins you select here are disabled. Choose one or all of the options:
•Disable machine translation plugins to disable all machine plugins for this project. •Disable terminology plugins to disable all terminology plugins for this project. •Disable translation memory plugins to disable all translation memory plugins for this project. 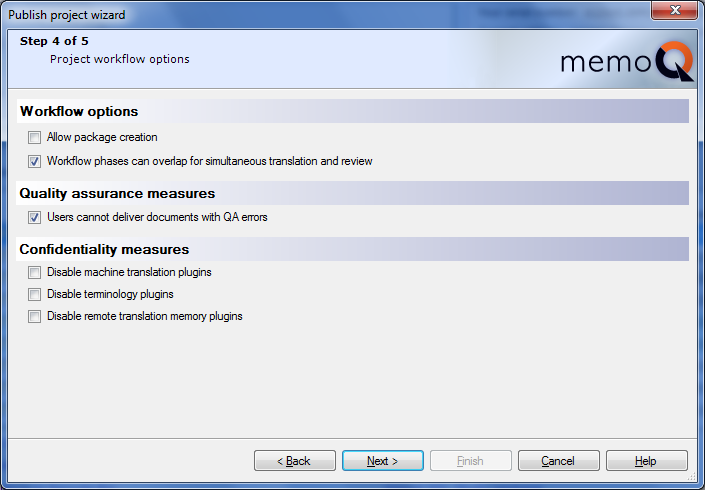
Navigation
Click Back to return to the second wizard page. Click Next to proceed to the third wizard page. Click Cancel to leave the wizard without publishing the project.
|
Step 5: Resources checkout options (no packages)
In the fifth dialog of the wizard (Resources checkout options), you can control the document options for checking out this project and enable communication.
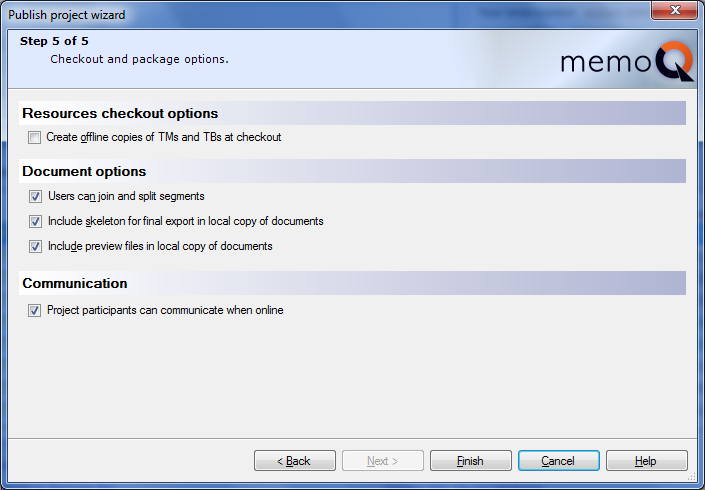
Resources checkout options section:
•Create offline copies of TMs and TBs at checkout: If this is selected, memoQ will create a local copy of all server-based translation memories and term bases that are included in the project. This option is turned off by default. If you turn it on, you enable the team members to work completely offline: because they will have a local copy of all resources in the project, they can work at full speed when they have no connection to the memoQ server. Resources in packages section:
If you enabled Allow package creation in the fourth step of the wizard, then this section is available. You can choose to create a project TM and term base, to include copies of the entire TMs and term base or to link to remot TMs, TBs and LiveDocs corpora.

Document options section:
•Users can join and split segment: This is turned on by default. However, if you have fixed the segmentation in the documents before loading them in the project (or assigning them to translators), and you do not want the team members to change it, you might want to turn off this option. •Include skeleton for final export in local copy of documents: This is turned on by default. Team members can export the translation on their computers in the same form as the original source documents. However, if you are concerned about the time it takes to download the documents, you might want to turn off this option. Users will have to download a smaller amount of data: they will be able to access the contents of the project more quickly. On the other hand, they will not be able to export the formatted translation. •Include preview files in local copy of documents: This is turned on by default. Team members can see the real-time preview of the documents they are working on. However, if you are concerned about the time it takes to download the documents, you might want to turn off this option. Users will have to download a smaller amount of data: they will be able to access the contents of the project more quickly. On the other hand, they will not be see the real-time preview, which might be crucial in certain projects. Caution: The lack of real-time preview can have a negative impact on the quality of translations. Be very careful when you turn off this option.
Communication section:
•Project participants can communicate when online check box: Check this check box if you want the team members to use discussions with the project. If this option is turned on, project participants will be able to use the discussion feature to exchange instant messages and to comment on a document, on segment level or on project level. The option is turned off by default. After reviewing – and, eventually, changing – these options, click Finish.
|
|